A stained glass wedding gift is a perfect way of making your friend’s Big Day extra-special.
Someone recently asked me if it was possible to create a panel from a photo of a couple on a lake. It was a picture of the ‘groom to be’ proposing to the ‘bride to be’ and the woman wanted to make a piece just like the picture for a wedding present.
She wanted to know if was possible to get that much detail in stained glass. After ascertaining that she didn’t have a kiln for firing paint on the glass, I suggested 3 different approaches.
If you want to replicate or interpret the scene with a degree of detail you can do one of two things:
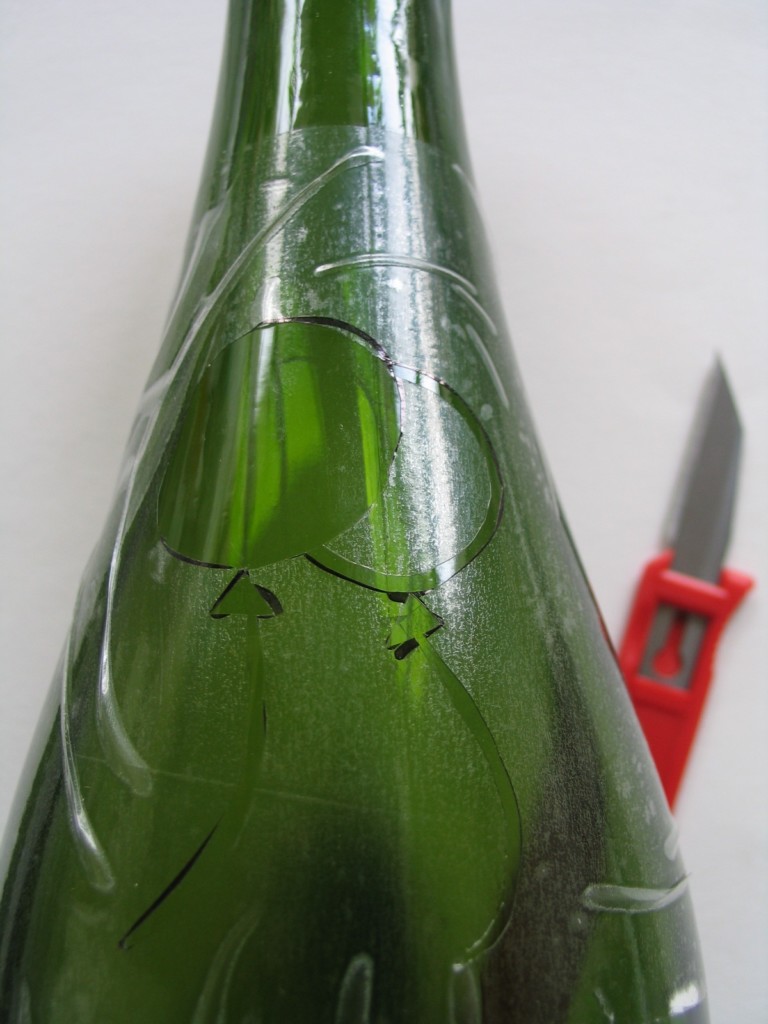
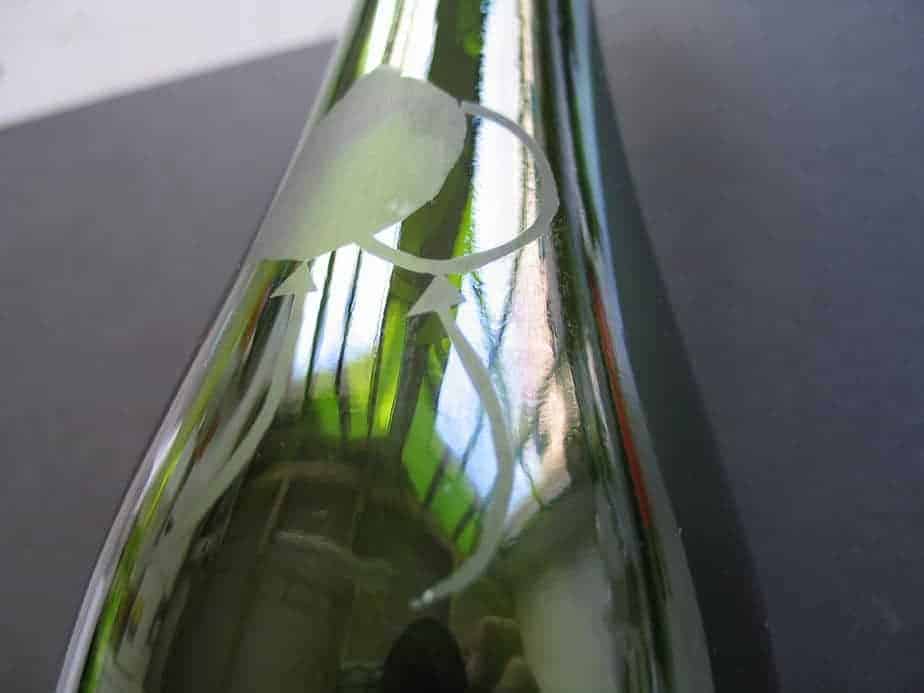
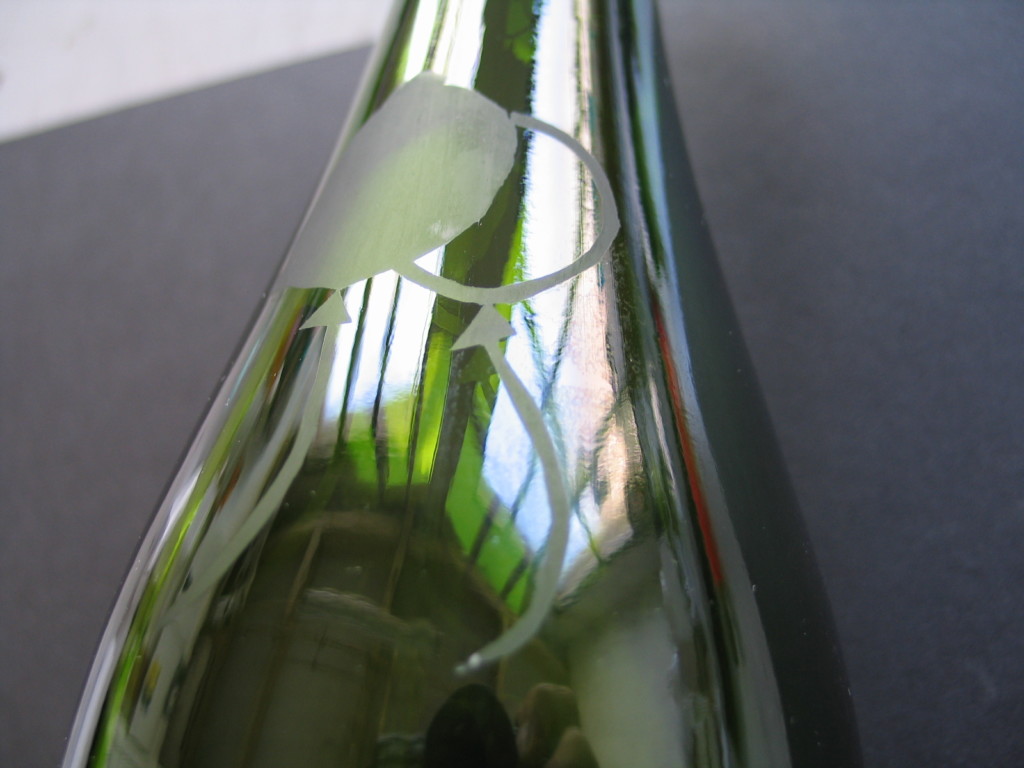
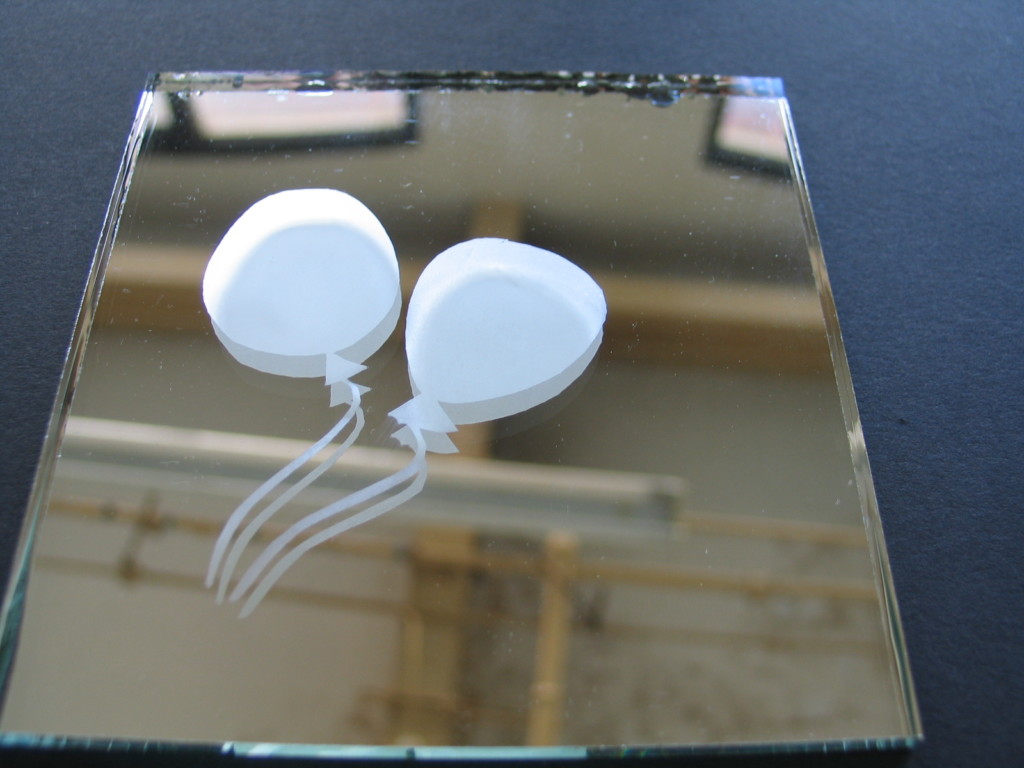
1. You could use etching cream to subtly depict the scene.
It’s not a dramatic technique, but it will be visible.
You can refer to the photo to make your own stencils with contact paper (shelf lining paper – sticky-backed plastic covering) and then etch onto the glass before leading or foiling it together as normal.
See how to do this here:
Create your own etching stencils
It’s worth noting that the etching paste works better (shows up more) on light cathedral (transparent) glass, rather than dark colours or opaque glass.
2. You can engrave details of the scene.
‘Engraving’ entails scratching the surface of the glass with a small drill bit – you can use a Dremel.
- Pick out the bits of the photo that you want to transfer to the glass and make a pattern first. Put it in a plastic folder so that it won’t get wet and lie it under the glass.
- Make sure the tip is wet by repeatedly dabbing the area you’re working on with a wet sponge. The difficulty is seeing what you’re doing, as the wetness obscures the line you’re making. You can do shading and all sorts, not just the outside line. Keep drying it off with a paper towel to make sure you’re on track.
- This page touches on this technique and shows a photo of the results (in this case, a child’s drawing was engraved onto the glass)
- Scroll down to ‘Types of Drills Available’ and read the ‘Flexible Drive Drill’ section. It all sounds a bit scary, but a Dremel will do!
- When you’re satisfied, you can lead or foil the pieces together as normal.
- Important! Don’t forget to cover the etching or the engraved marks with contact paper before the soldering stage. Only remove after the polishing stage. This prevents getting grime and dirt into your lovely etched or engraved pictures, which is nearly impossible to remove.
There is a third option, and this is just using glass and foil and/or lead and won’t have so much detail.
3. You can look at the photo and extract little pieces of it that have significance – a ring for example or some local detail – and then make an abstract design that includes this item or items.
You could, for example, create a circular piece of a lake landscape with a gold border – the border signifying the ring. Do you see where I’m coming from?
I wouldn’t try and include too much – it’s often a mistake to try and throw everything in the design to give it added significance but it just ends up messy.