I have worked with stained glass as a hobby for about 6 years. I have an opportunity to build two windows for our church, which means duplicating the existing windows.
The painting techniques used appears to be a sponge effect, giving highlight to the center of each rectangle piece of glass. The glass paint is black and appears to be fired on every piece. The glass is red, purple, blue, etc.
These windows were built in 1950. The effect works great.
I have built several large stained glass panels and feel I can do this but I have never seen this done with glass.
Some of the white panels are completely blacked out except for small circles (gives a bead appearance).
Most panels are about 12″ x 4″ varying in colors, so if I could find out how to do this, I could sponge and fire myself.
Any tips or leads I would appreciate. Thanks. Shaun
Milly’s answer:
What a great commission! I too am sure you can do this; you just need access to a kiln and some painting equipment.
If you’ve never done any glass painting – sometimes called enamelling – before, I have lots of information already on this site that might be helpful. To get you started, check out the Painting page for tutorials on everything to do with stained glass painting, from mixing to applying.
You can put the paint on with anything that gives you the effect you’re after. I quite often use sponges, but if this isn’t quite what you want, you could try crumpled up tissue paper or material – play around with a few different things until you’re happy with the effect.
If the windows are up high, try not to get too precious – the viewers will only register the exciting light/dark dynamic that this kind of glass painting with black pigment achieves – they won’t be scrutinizing every mark!
With regards to firing the paint, it’s the simplest kiln firing schedule you can do – 150 degrees C an hour to top temperature – manufacturers will specify, but it’s normally between 550-650 degrees C. Hold – or soak – at this temperature for five minutes and then turn the kiln off. You’ll need to anneal if you have larger pieces, or if your kiln is not very well insulated.
However tempting, don’t open it until it’s reached room temperature! Check out Kiln Firing Schedule to learn more about what your glass is doing during the firing cycle.
I hope this gives you a good start. Let me know if you need any more information, and get the photos on this website when you’re done – I’d love to see them.
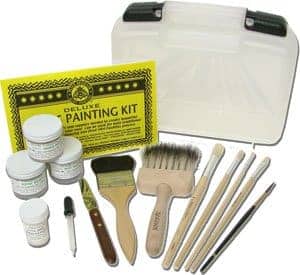
This painting starter kit is available on Amazon
This painting starter kit is available on Amazon Peter Mcgrain Deluxe Paint Starter Kit

