How to Do Neat Diamond Shapes in Lead Came

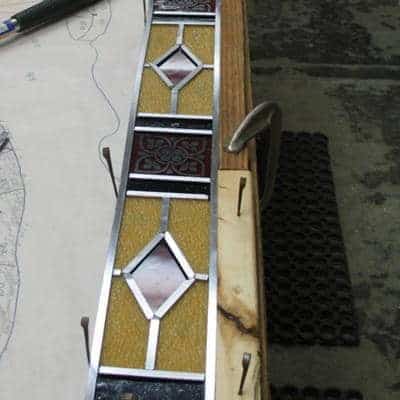
Tricky leaded diamond borders
I am never satisfied with my leading on borders containing diamond shapes…I just can’t figure out a consistent way to do it…can you help me do this better?
Milly’s reply: You know how to make things difficult for yourself Tammy! Borders like this are tricky, but you’re not doing a bad job you know.
Let’s start with the top of the diamond; forget about the straight joining lead at this point – imagine that you’re just leading the diamond on its own.
To make them neater you have to cut the lead came that makes the point of the diamond shape first. These two sit flush together, creating a neat point. You need a slimmer angle on them than you are currently using.
Now is the time to think about the straight lead. What you seem to be doing at the moment is cutting straight across, whereas what you need to do is cut a section of the heart of the lead out – say about 8mm. You do this – carefully! – with your lead knife. When you’ve done this you have to cut a ‘V’ shape from the top and bottom flange from the ‘heartless’ bit of your lead came, corresponding to the shape of the top of your diamond. You can do this with a sharp lead knife or a sharp sturdy craft knife. And there you are, it then butts up against the top of your diamond – simple?!!
It would be much easier to show you, but I hope this has explained it enough – the trick is to cut the heart out of the adjoining straight lead.


Great advice! I use diamonds a lot and can’t wait to apply this process. I am challenging myself with lots of curvy pieces and this would be great to work with lead came this way.
Good luck Brenda for when you try it. Glad you’re inspired to give it a try 🙂