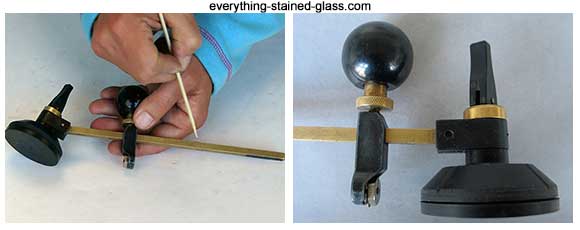
Cut Perfect Circles First Time
This stained glass circle cutter is very easy to use. It only takes a couple of practice runs to get really good at it. If you start off with window glass then you won’t waste any of your precious art glass.
The 5 minute video below shows you just how simple it is to use.
5 minute video showing how to use a circle cutter
Recommended Circle Cutter
I’ve tried other glass circle cutters but this German made Silberschnitt (paid link) is the one I prefer.
This is partly because it has a strong suction cup that sticks to the glass and stays firmly in place when you’re making your score. Other cheaper circle cutters don’t have this cup.
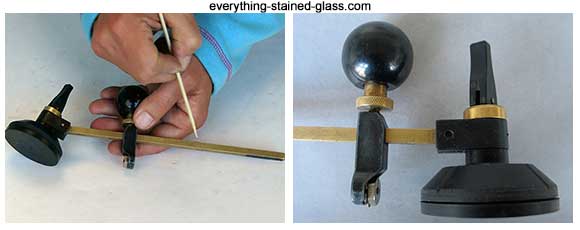
This one has a 6-wheel cutting turret. When the wheels get a bit blunt, simply unscrew the turret to a brand new cutting wheel and off you go again! I haven’t got through all six yet, they are very long-lasting.
The ruler is marked with both inches and centimetres so that you can cut the precise size you’re after. You can cut circles from 2-1/2″ to 24″ with this particular cutter.
The Silberschnitt Pro Circle Cutter is the one I use and recommend.
Buy the Pro Circle Cutter here from Amazon (paid link).
How To Cut A Glass Circle
Step 1 – Preparation
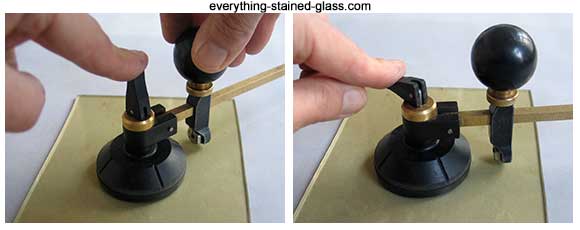
– First you need to set the ruler measurements to the right size for your circle. Do this by unscrewing the ring just under the black knob and slide the cutter to the correct position on the ruler.
– Once you’re happy with that you need to check that there is room all around the glass for the cutter to make a score. You don’t want to get half way around and run out of space!
Put the suction pad in the middle of the glass (don’t stick it yet) and gently swivel the cutter head all the way around.
You need about 1/2″ gap to the edge of the glass otherwise it might break.
– When you’re happy with the position, bend the lever on top of the suction pad. This creates the sucking action needed to stick the pad firmly to the glass.
– Make sure you have some oil on the wheel to lubricate it. You can do this with a Q-tip or an oil-soaked sponge. Now you’re ready to go.
Step 2 – Making The Score
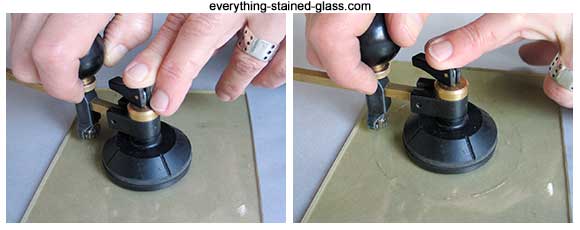
– If you’re a ‘righty’, hold the suction cup down with your left hand and start turning the turret around. Press lightly but consistently downwards as you go around. Your score needs to be even.
– Go all the way around, ‘under’ your left arm and until you hear a ‘click’ when you meet up with the beginning of the score. Stop immediately – you don’t want to ruin the wheel by going over the score line.
Step 3 – Running The Score
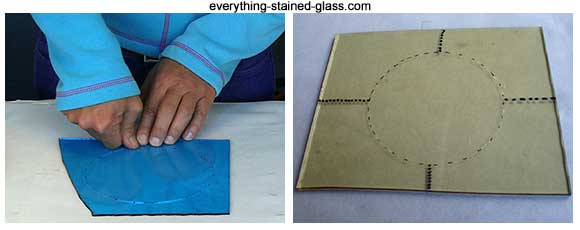
– Turn the glass over so that the scoreline is underneath. Press lightly around the score until you can see it opening up. You can do this with your thumbs or the rubber handles of your pliers.
– Now turn the glass over again so that the score is back on top.
Step 4 – Releasing The Circle
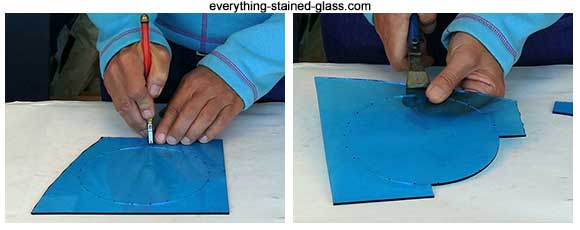
– With your regular glass cutter you need to make a few scorelines from the circle to the edge of the glass. Start at the circle and work outwards to the edge as this will stop you overshooting and scoring into the circle.
– Line up your cut running pliers with the score and press gently but firmly. If your scorelines are good then each section should come out easily as you go.
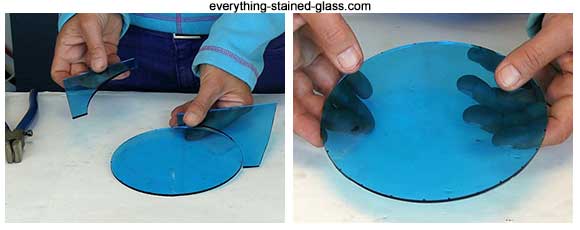
That’s all there is to it! One perfect glass circle that doesn’t need grozing or grinding.
Did you know it’s easy to cut circles in glass without a circle cutter? Here’s my video showing you how.

