Achieve Flowing Lines
These instructions show you how to mix your paint properly. Doing this will make your painting flow smoothly, without blemishes.
What medium is best?
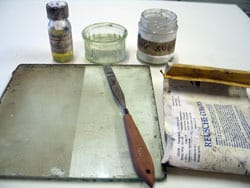
– You can mix enamels with various mediums, depending on what you’re trying to achieve.
– This can be a bit confusing as there are many variations, but broadly these fall into two categories: oil-based and water-based.
There’s artistic and technical reasons for choosing different mediums – on the arty side, oil mixes are better for thicker, more definite lines whereas water is far more lively and spontaneous.
On the techie side – you can save electricity and time by firing two layers at the same time if the first layer is oil-based and the top one water-based.
I’ll start you off with glass painting instructions for the most commonly used water-based paint mix – your skills can then be adapted for other recipes.
Water-based painting mix
What you need
Glass palette (ideally 1/4″ (6mm) thick and half sandblasted) Palette knife. Water jar. Glass paint. Gum Arabic (icing sugar works as a good substitute). Pipette.
1 Ratios
It’s a good idea to be fairly generous with the amount of paint you mix.
Don’t worry about waste, it will keep if you place it under a jam jar with a water seal it can be rehydrated the following day.
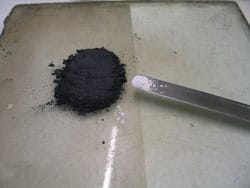
– Put a tablespoonful of paint on your palette and pat it down to a 5mm ‘pancake’. – Then take about a sixteenth of a teaspoon of powdered gum Arabic – yes, a tiny bit! – on the end of your palette knife and tap it gently over the flattened paint, so it looks like the first falling of powdery snow.
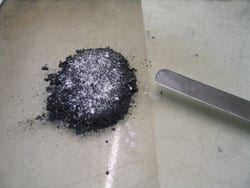
2 Dry mix
– With your palette knife, mix the gum Arabic or icing sugar thoroughly together, grinding out any dry lumps.
3 Add water
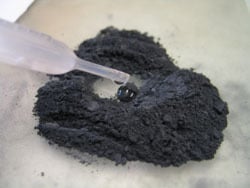
– Use a pipette to add water – it’s more controllable and stays clean.
– Make a well in the middle of your dry paint and gum Arabic, and start adding water a bit at a time.
– You don’t want to add too much otherwise you’ll have to add more paint and more water and more paint…
– Take all the paint up and mix to a thick yogurty consistency.
4 Grinding the paint
Thankfully paints these days are ground extremely finely by machines – otherwise you’d be up for half an hour of arm ache.
Instead, a few minutes of dedicated grinding of the paint should be enough.
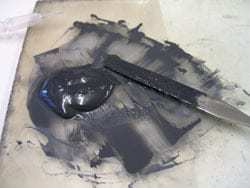
– The palette knife should be used to grind the paint in a circular motion, with some downward pressure. It’s ready when it’s a smooth paste.
– Repeatedly scrape it up together neatly – you don’t want it all over your palette.
Don’t add too much water at this stage – the main bulk of the paint is used as a ‘reservoir’ from which you take small amounts as needed from the edge before watering it down further.
5 Testing the paint
I expect you’re wondering when in these glass painting instructions you’re going to learn just what to do with the icing sugar?!
The gum or sugar is used both as a vehicle to help the painting flow and to adhere it to the surface of the glass.
You need to have the correct ratio, otherwise the paint will be too sticky and bubble when firing, or not stick sufficiently to the glass. This is the time to test it and see.
– Use a painting brush with a bit of additional water and make a couple of lines of paint on clean glass.
– Let them dry and then gently, with a dry fingertip, rub over the surface of the paint. It should be resistant, but not stubborn to your touch. Try scratching into it with a toothpick – it should come off fairly easily.
– If you have trouble scratching it off, you have too much gum, and need to add more paint.
– Conversely, if it falls off with hardly a touch, you need to add more gum.
– Mix this with a little water before adding to the mix, and re-test.
– Testing your paint isn’t a once-only job – you should often be giving it a quick test to make sure its’ composition hasn’t radically changed.
Once you’ve mixed your paint, you’re ready to start the line work.
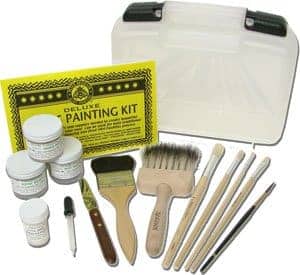
This painting kit is available on Amazon Peter Mcgrain Deluxe Paint Starter Kit (paid link)


I have little pinholes in the black after firing. I suspect too much gum arabic? Will more and more keep burning off after each firing since I still have to add the matting/color to my piece in multiple firings?
You always have to account for a degree of paint firing off Mel. You can apply it a little darker than you want the finished article. Knowing how much comes with experience.
Good luck.
I am painting the inside of bottles for my daughter’s wedding. Bottles are scrubbed and cleaned out prior to pouring in stained glass paint. I leave bottles inside down to drain and as they dry, bottles have clumps of dried paint. Any suggestions on how to eliminate them?
I’ve never tried this Joanne so can’t help with any confidence. Would keeping them moving as they dry help any?
Hi Milly, I wonder if you have an article that explains how to mix with oils instead – and also glycerine please?
I don’t Penny, sorry. It’s the same principle. Look at the website Real Glass Painting; it’s a brilliant site dedicated to just painting on glass.
Thanks for the info
You’re welcome John 🙂