Make a Light Box in 15 Minutes
A light box is crucial to high quality stained glass work if natural light is not an option. They allow you to assess the colours of the glass at different stages in your project.
Many of us don’t have the skills or tools to make a more traditional lightbox. The good news is that now you no longer need them; LED Flat Panel Ceiling Light Fixtures are the answer!*
With these fixtures you can create a large or small light box in 15 minutes with just a few tools.
*Big thanks to reader Ron Dinsdale for providing this tutorial to share 🙂
Click here to jump down for some extra ideas for lightboxes
Things You Need
- LED Flat Panel Ceiling Light
- A workbench with a surface you can cut a hole into. This is to accommodate the Electrical Box which stands proud at the back of the Panel
- Drill
- Jig saw
- Screwdriver
- Wiring
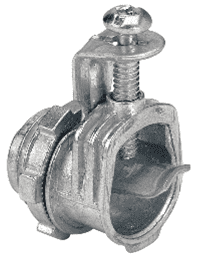
- Wire connectors and a plug
How To Make a Light Box
1. Buy a LED Flat Panel Ceiling Light fixture of a size to fit your work bench.
The ceiling light panels are available from hardware stores such as Home Depot and Lowes in the US and Canada and B&Q in the UK .
A 24 in. x 48 in. panel costs C$99 or US$83 and around £63 in the UK. (24 in. x 24 in. start around $50).
2. Lay the panel upside-down on the work bench in the position you want it. Make sure the electrical box is closest to your wall socket.
3. Pencil a line on the workbench along the edge of the panel matching the width of the electrical box. Then slide the panel away from that line.
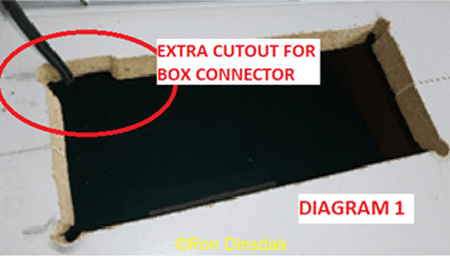
4. Measure the length of the electrical box and copy the dimensions of the box onto the work bench, adding 1/4″ on all sides for fitting. Add an extra 1″X 2″ piece on the appropriate side for the box connector which will jut out from the electrical box.
5. Cut a hole in the work bench per Diagram 1, below. Drill out each corner with a drill bit larger than the jig saw blade to give yourself starting positions.
Cut each side with the jig saw set at less than 90 degrees so the cut-out can be dropped back in place if the light box is removed.
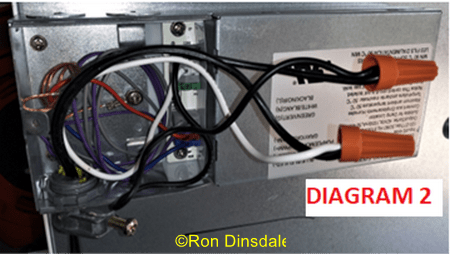
6. Wire the electricals per Diagram 2, below. It is recommended to use a 3-prong plug and ground wire. Connect the other end of the wiring to a plug.
Disclaimer: this should be performed by a qualified electrician.
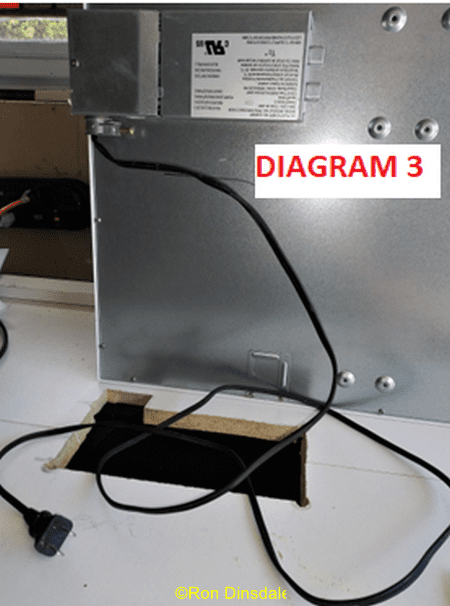
7. Screw the cover back on the box, to look like Diagram 3, below.
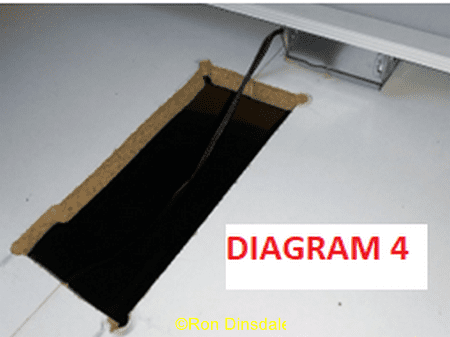
8. Turn the panel face up. Lay it on the work bench and thread the wiring through the hole per Diagram 4.
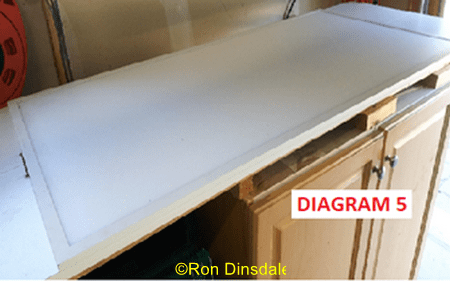
9. Slide the panel into position so the electrical box falls into the hole in the work bench per Diagram 5. The panel will sit flush with the work bench. Connect the wiring to the wall receptacle.
10. Optional. To protect the Panel surface from scratches and damage, overlay a matching piece of clear acrylic sheeting (Plexiglas) per Diagram 6.

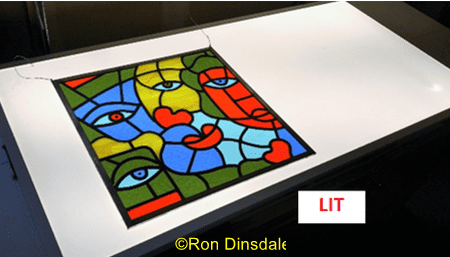
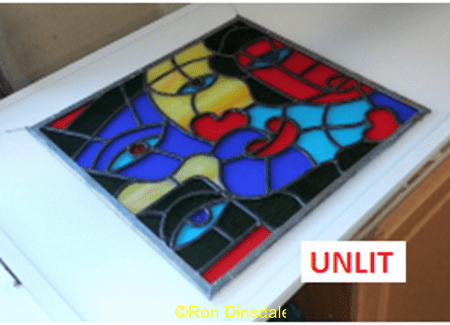
To show the benefit of the light table, below are photos of my ‘Homage to Joe Average’, a Vancouver, Canada artist. Go to https://joeaverageart.com/ . With his bold lines and strong uncluttered images, Joe’s work just cries out for stained glass interpretations.
Why Do I Need A Light Box For Stained Glass?
You need a lightbox for a few different reasons:
- To trace your patterns.
- To help select your glass for your projects. A light box enables you to check if the colours go together and the balance of light and dark is pleasing. (see ‘Last Thoughts’ below)
- To cut your selected glass out on. This is especially effective if you’re using the ‘English method’ of cutting transparent glass. Simply trace the shape onto your glass and cut it out on the lightbox.
- To lay your cut glass pieces out on the pattern for a last check before assembling. This is good practice as it gives you an opportunity to change out any obvious colours that are jarring or not fitting together accurately enough.
Some Extra Lightbox Ideas From Readers
Light Box On Wheels
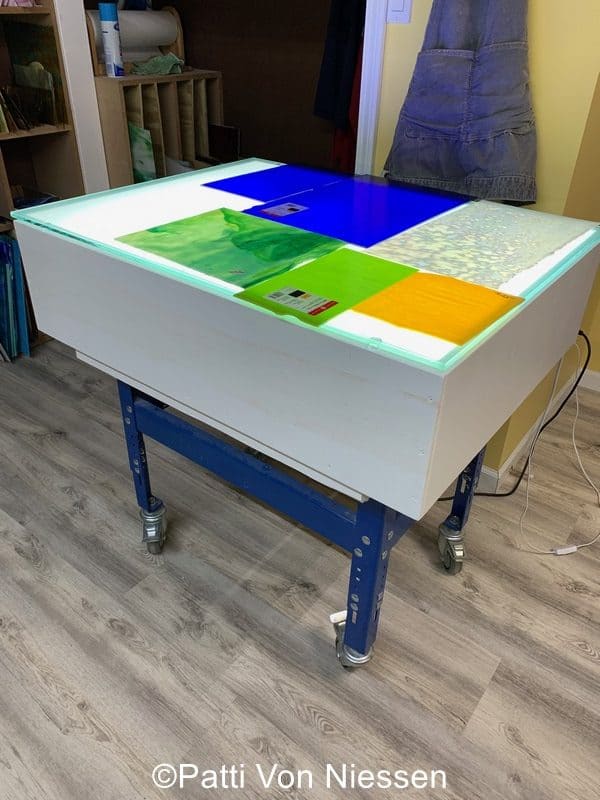
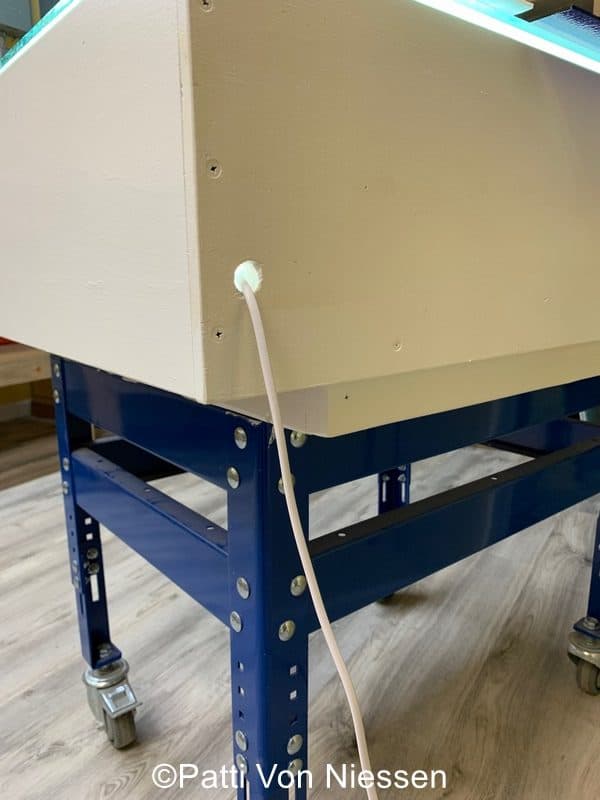
Patti von Niessen has kindly shared her clever idea for a light box on wheels. It’s especially helpful if you don’t have room for a permanent light box in your studio.
She says she built her light box on a Kreig stand, then added castors so she could roll it where she wanted it, and then roll it out of the way for the day.
She used a piece of tempered glass (30” x 40”) for the cutting surface. She found this on Facebook marketplace for $10. She then used Rust-oleum Frosted Glass spray over it to make it opaque. This prevents the dominant LED spots of light from glaring through the glass.
LED light strips are attached under the glass.
Thanks Patti.
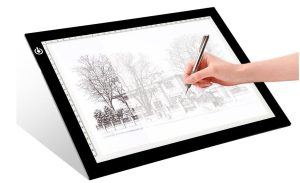
Portable LED Sketch Pad
Ray Walsh uses a portable LED light table for tracing. He says it’s very lightweight, thin, portable and adjustable. It can run either off mains power or plug into the type of rechargeable battery you use with your phone.
Note: This is not suitable for cutting on but is great for design.
Here’s an example of the pad available on Amazon (paid link)
Alternative Home Made Light Box
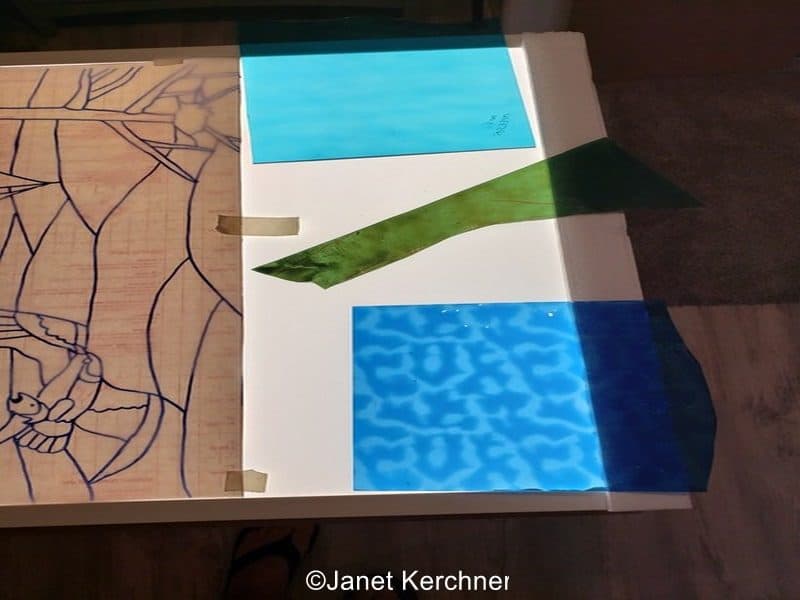
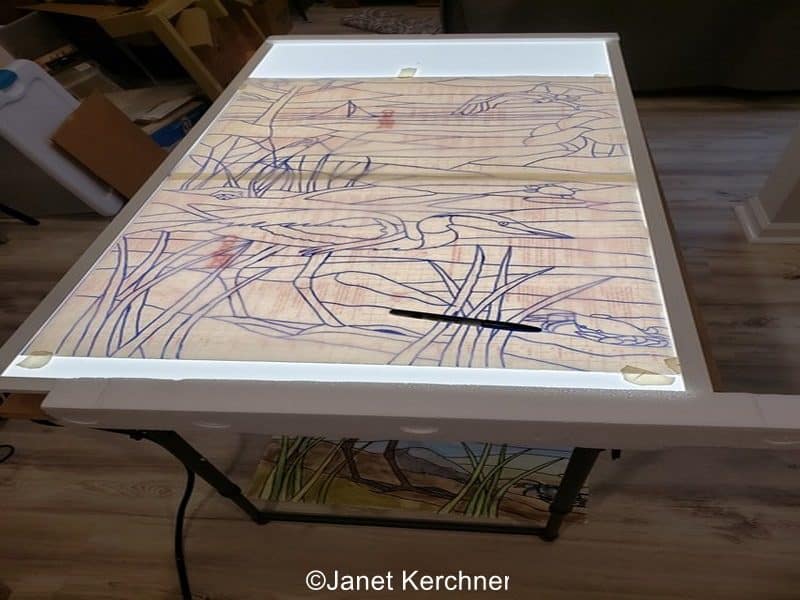
Janet Kerchner had a tricky project. She was making a 22″ x 36″ Chesapeake Bay-themed stained glass window for her daughter’s new house. Her main challenge was seeing the glass colours while she was working. She came up with a clever solution.
She created a large DIY light box using the following equipment:
- LED troffer from Home Depot ($69). A troffer is a rectangular light fixture that fits into a ceiling
- Folding table with Styrofoam supports
- Clear glass sheet to protect the surface
- Frame to control panel dimensions
This is Janet’s work flow:
- She uses translucent paper for her design layout
- She cuts the glass on a separate solid surface
- She uses contact paper templates on coloured glass
This DIY light box is a smart, cost-effective solution for larger stained glass projects. It’s a great example of creative problem-solving in crafting. Thanks Janet.
Last Thoughts on Lightboxes For Stained Glass
It’s worth noting that natural light is nearly always better for selecting glass than using a lightbox. This is because we normally see stained glass with natural light behind it. Light boxes are a very good compromise when there is no natural light source.
You should always aim to choose your glass by holding it up to the same type of light that it will eventually be displayed in.
To help you see lots of different glasses up together you can construct a strong easel in front of a window. You can also use the technique of Lead Lining for a final check once the glass is all cut and ready to be assembled.
Read more about Lead Lining here.
Read about how to Backlight Stained Glass
I built a light box using one drawer in my workbench – I have 8 drawers on one side- I use a small under the counter light – placed so the light shines upwards in the drawer (use the daylight florescent light) and cover the drawer with a piece of clear tempered glass the size of the drawer. When I need it, I open the drawer, plug the light in and copy away; when I am done, I unplug the light and close the drawer. I know florescent lights are “old-school”, but I built this workbench 10 years ago – would use LED if doing it now.
I have a wonderful image of your lighted drawer opening and closing – fab, thanks Lynn.
I too have florescent tubes in my ancient light box… same reason and same reasoning about if I were to make it now.
How do you use the light box to make larger patterns. The simplest would be to design the pattern within the framework of the light box then have the design enlarged by going somewhere to have it printed into the size you want. The other option may be to draw the pattern in sections then taping the sections together.
Thank you, Marlene
Thanks for your considered thoughts Marlene, they’re all very helpful for my readers 🙂
When printing companies switched from litho film to digital printing, thousands of high quality light boxes were sent to be recycled. Check with your local printer as they may want to part with them just for the space. I have been using one for years for my stained glass projects.
That’s a great tip Thomas. They may still have light boxes hanging about still. Fingers crossed.
When prepping glass pieces for large panels should all pieces be dressed with
the grinder for the the foil to adhere?
No, you don’t have to grind pieces for the foil to stick. I use a carborundum stone to make the edges safe, then foil. I only grind to fit. I hope that answers your question.
Milly,
Your tutorial on making a light box is very useful and I have found several appropriate LED light panels at Home Depot that would probably work. Quick question….when using an LED light as the background which light temperature or color would be best for use in the light box.
Thank you so much!
Cliff
Good question Cliff but one that I can’t answer as it’s totally up to you as the artist what sort of lighting your piece demands… have fun experimenting 🙂
I can’t recall the Kelvin Temperature of the top of my head, but lightbulbs (including LED) are rated as cool, warm or daylight. Daylight is truest light for viewing colors.
Natural daylight is between 5000 and 6500 Kelvin, so if your LED has a setting for that range, it should give you a true white light.
That’s very useful to know Maureen, thanks.
Hallo Milly Frances, thanks for you information. Mijn engels is te slecht om de diverse conversaties te volgen. (My English is too bad to follow the various conversations. I need photos.) I need fotos. May be, some one can post pictures?
Groeten van Elisa
Hi Elisa, There’s no facility to add photos in the Comments Section, sorry.
You can put text into Google Translate (as I did your comment to translate above, in brackets and below).
Hallo Elisa, Er is geen mogelijkheid om foto’s toe te voegen in het opmerkingengedeelte, sorry.
U kunt tekst in Google Translate plaatsen (zoals ik uw commentaar hierboven, tussen haakjes en hieronder, heb vertaald).
I use vintage tv screen made for lead
the lead tv screen have a beautifull ship of white pastic exactly made for let go thelight from lead
you ca get it from bad tv at recycling junck co
like this you do not have the direct light from your source of light
a good way to recycling
also some very vontage tv retroprojector type tv have this kins of sytem already made
jack 47 71
Thanks for this Jacques, interesting.
I like to repurpose whenever I can. We were replacing a refrigerator and one of the vegetable drawers had a glass top. Whenever I need a small light box, I put a work light in the drawer and voila, works well for cutting patterns. Not ideal, but it does the trick for me
Oh that’s ingenious Marilyn. It also made me smile, which is nice on a Wednesday morning 🙂
I feel I must make a response to the latest regarding light boxes. I have in the past made a temporary light box for specific projects and can whole heartedly support your comments on the tremendous asset they can be.
I am based in the UK and use three UK type LED light panels to illuminate my workspace. As overhead lighting they are unbeatable. I have not however come across the type of panel Ron has used, I am positive that these somewhat industrial looking panels are of American origin. Virtually all UK produced panels do not have such a bulky or complex wiring systems. They do however have a short trailing lead extending from the back of the panel which has a ‘plug and play’ socket which is attached to a small very neat LED driver (power supply), the driver unit has a length of quite thin cable to attach either to a lighting circuit or to a 13 amp plug /socket, the 13 amp plug option is entirely a DIY task.
Perhaps more significantly Ron’s option of placing an acrylic sheet over the panel is far from an option. UK panels have a slightly flexible surface which would scratch extremely easily, but more than that the panel would not withstand anything being worked upon directly on its surface. The pressure of tracing or cutting glass would very rapidly destroy the panel. A protective acrylic sheet, (Plexiglas / Perspex) would be an absolute must. On that tack, a 60cmx60cm (2ft x 2ft) 4mm thick sheet would cost in the region of £25 + postage.
Sorry to be quite so negative but would not wish to see UK glass makers destroying their lightboxes unnecessarily.
Thank you so much for your considered comment Steve, I appreciate your time and your viewpoint. On the back of this, if you’re from the UK – or anywhere other than the USA – choose your light panel with care, make sure it’s suitable for this type of use.
Ron does mention the protective acrylic (#10 above) as an option but it could be a prerequisite with a less robust panel.
Wonderful tutorial!!!!
Thank you Gail, glad you found it of use 🙂
I built my light box on a Kreig stand, then added castors so I could roll it where I wanted it, then roll it out of the way for the day.
I used a piece of tempered glass (30” x 40”) that I found on Facebook marketplace for $10, that I sprayed a glass frosting onto.
LED light strips are attached under the glass.
I’d love to send a photo of it, but there’s no way to attach it here.
Thank you for your tip Patricia, it sounds great. I hope it’s okay but I’ve emailed you so that you can email your photo.