
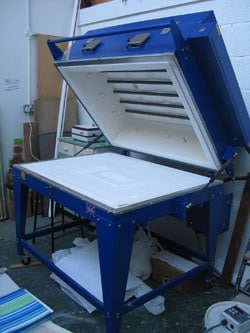
Getting Started with Kiln Firing
To put together a kiln firing schedule it’s a good idea to understand the various states that glass goes through during a firing cycle. It also helps to know what temperatures you need for the different techniques, such as painting, fusing and slumping.
Knowing this will give you the confidence to adapt and make up your own firing cycles to suit your own projects and your individual kiln.
Firing is a complicated business because there are so many variables. These include:
- the size of your kiln
- where the elements are situated
- how well insulated it is
- hot and cold spots
And that’s before you even start thinking about:
- the different types of glass
- the thickness and size of your project
- whether you’re firing something that has been fired previously
Because of all these variables, you can only ever use other peoples’ kiln firing schedule as a guide.
What happens to glass inside a kiln?
1 Going up. Primal heat up – 32F / 0C – 1004F / 540C
This is the thermal shock range.
Don’t heat your glass up too quickly or open the kiln when it’s too hot.
A heating rate of 300F/150C per hour is a conservative bet for this stage.
Vent your kiln during this phase by opening the bungs. This allows fumes from paint or glue to burn off and help prevent devitrification.
2 Going up. Forming stage – 1004F / 540C – 1310F / 710C
The glass changes from light to bright honey colour at this temperature.
Stain (or silver nitrate) fires at 1004F/540C – 1022F /550C, paint 1202F / 650C, and low-firing enamels 1022F /550C – 1202F / 650C.
A suitable kiln firing schedule for these techniques only is to take them to top temperature, soak (or hold) for five minutes, and then simply turn the kiln off to cool to ambient temperature at its own rate.
Only do this if your kiln is very well insulated, otherwise the cooling down phase will be too quick and you’ll risk thermal shock (cracking).
Firing these decorative surface techniques are the simplest types of kiln firing schedule you can do.
Most types of glass will slump within this range. It will stick together if touching, and bubbling between layers can occur if it is heated too rapidly at this stage.
3 Going up. Stretching stage – 1310F / 710C – 1508F / 820C

Now it’s getting exciting.
The glass looks bright red, and has a putty-like consistency.
Devitrification, when unsightly crystals form on the surface, could happen if glass is heated too slowly through this range.
Most glass will be fully fused at the top of this stage. High firing enamels fire in this range.
4 Going up. Liquid stage – 1508F / 820C -1832F / 1000C
Glass glows red at this heat. Don’t soak at this temperature – it’s too hot and the glass may become milky.
If you want to comb your glass, around 1634F / 890C is the right top temperature for your kiln firing schedule (see video below).

5. Going down. Quick descent – 1832F / 1000C – 1112F / 600 C
You need to get from your top temperature to the annealing (cooling down) stage as quickly as possible by programming ‘Full’ or ‘999′ into the controller.
You can open the kiln door at this point to crash cool. It’s very exciting (and hot), although it is no longer a recommended practice.
6 Going down. Annealing range – 1112F / 600 C – 788F / 420C
Stress is relieved during this stage. Annealing can take ages, and it’s a nerve-racking wait when you’re waiting for a project you’ve spent hours on.
When glass is heated above its Strain Point (around 860F / 460C) the molecules are rearranged, and need to be given time to rearrange during cooling, but before it hardens.
Soaking (holding at one temperature) spreads the heat evenly. It’s very important to give your glasswork enough time to realign its molecular structure at this stage.
You can never over anneal glass. But it’s likely to crack if you under anneal it.
7 Going down. Cooling – 788F / 420C – 212F / 100C
Once below Strain Point, glass can be cooled more rapidly. Some artists crack their kiln open at any point in this range, but I certainly wouldn’t recommend it.
If you can bear it, it’s best to wait until room temperature or at least 212F / 100C and even then only open it a tiny bit.
Helpful Resources
This Contemporary Fused Glass book (paid link)is quite simply the best book out there on fusing, slumping and kiln-forming. It’s clear, informed and full of interesting photos of inspiring glassart.

Here’s a 2 and a half minute video showing a fused piece being combed. It gives a good idea of what is happening inside the kiln at the higher temperatures.
This is a very dangerous technique. If you want to try it, make sure you have all the correct safety equipment and are not on your own. Turn the kiln off, otherwise you are at risk of getting an electric shock.
Raking or combing in a fusing kiln
Kiln Firing Schedule for Adding Texture To Your Glass