Finding The Grain Direction
The grain direction of textured stained glass is crucial if you want to make eye-catching work. But how do you work it out?
I have a simple trick to help you:
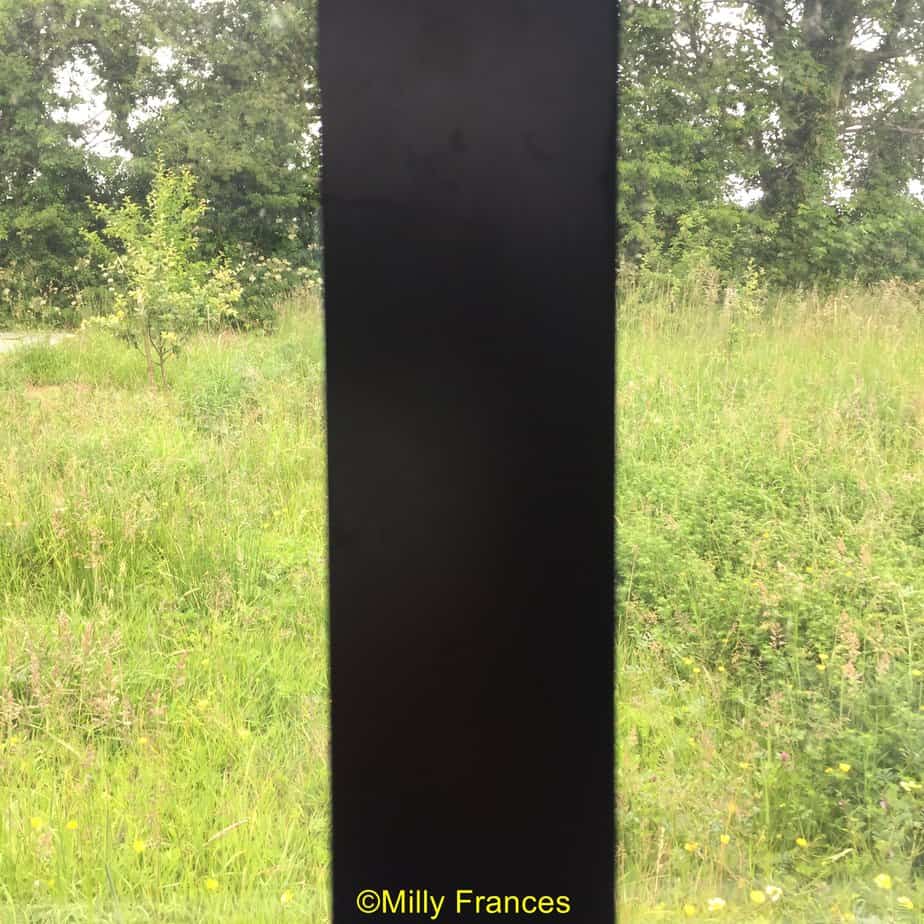
- Focus on a strong, vertical geometric object in the middle distance – for example, a telephone pole. If you don’t have one close by you can set up your own – in the photos below I used a right-angled ruler (image 1)
- Close one eye and move the glass slowly in front of and across your face. Focus on the pole, not the glass.
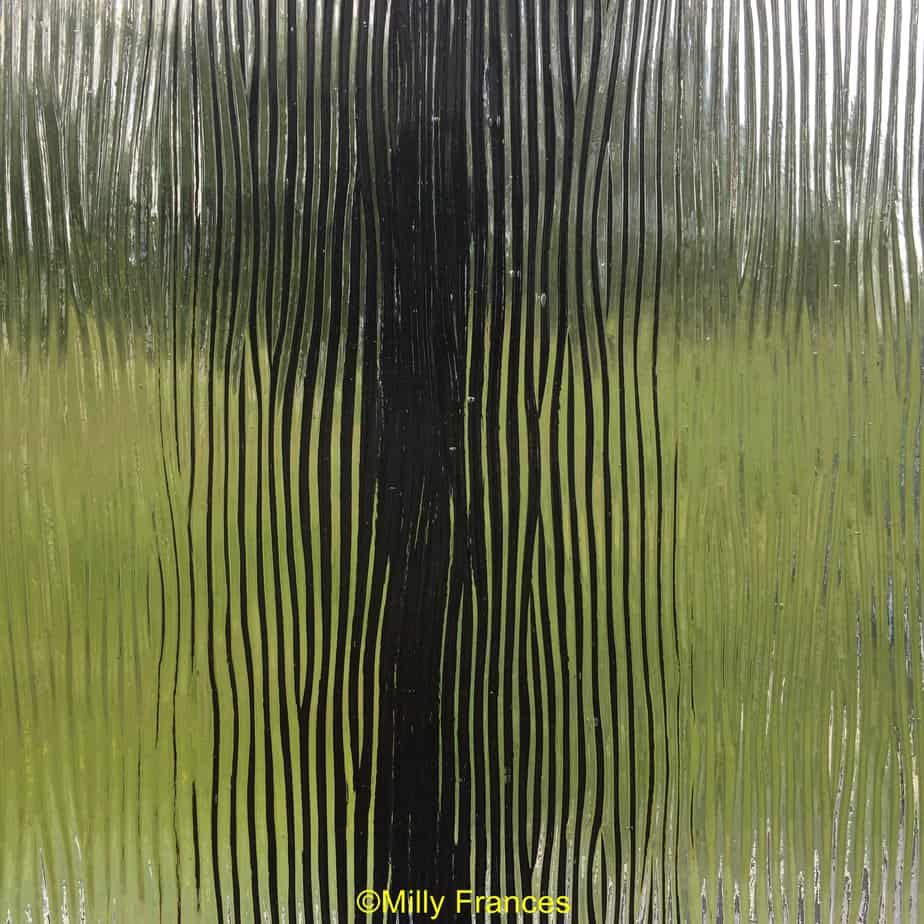
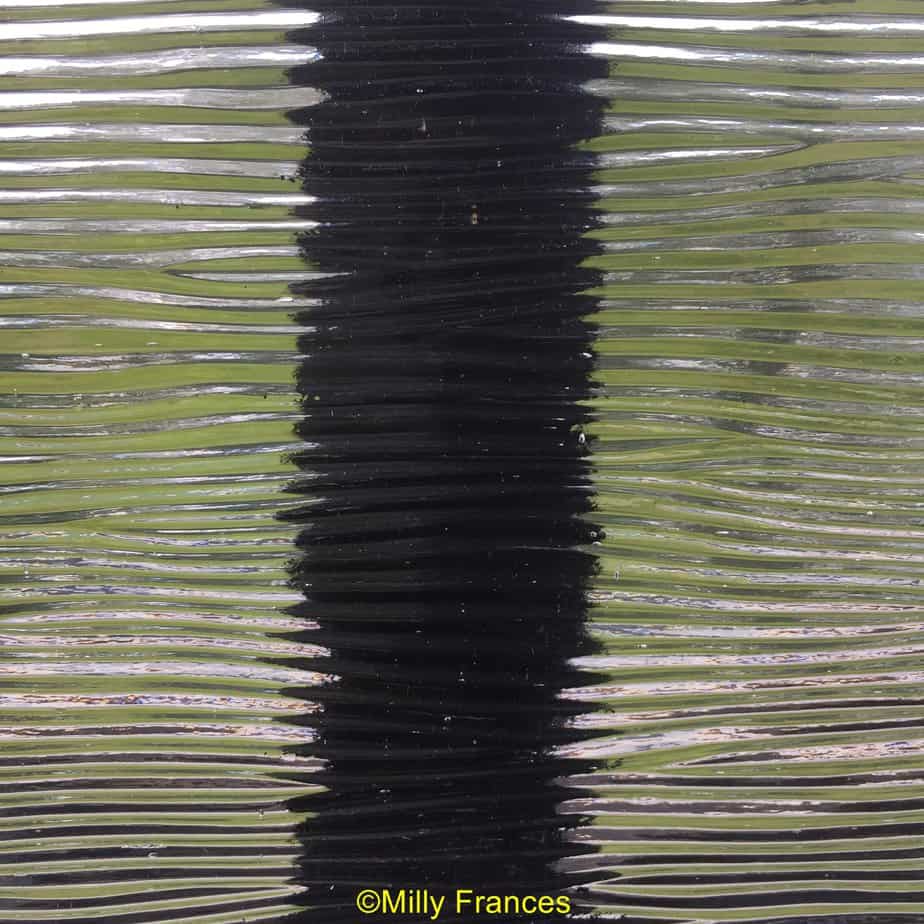
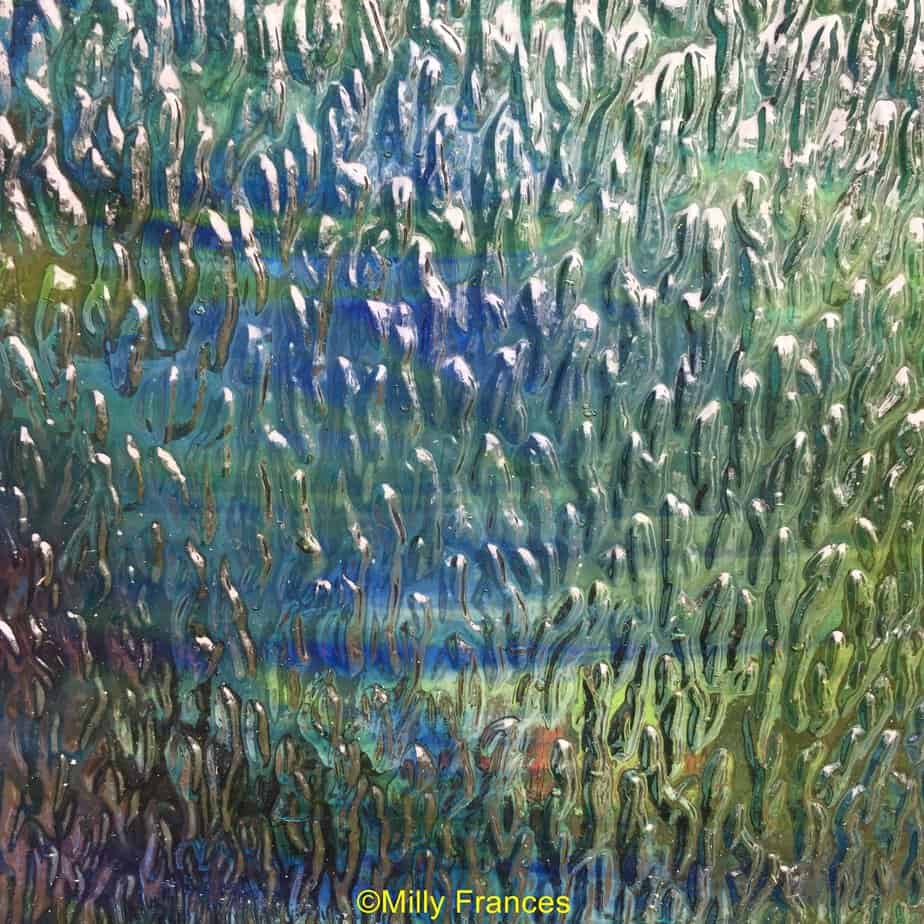
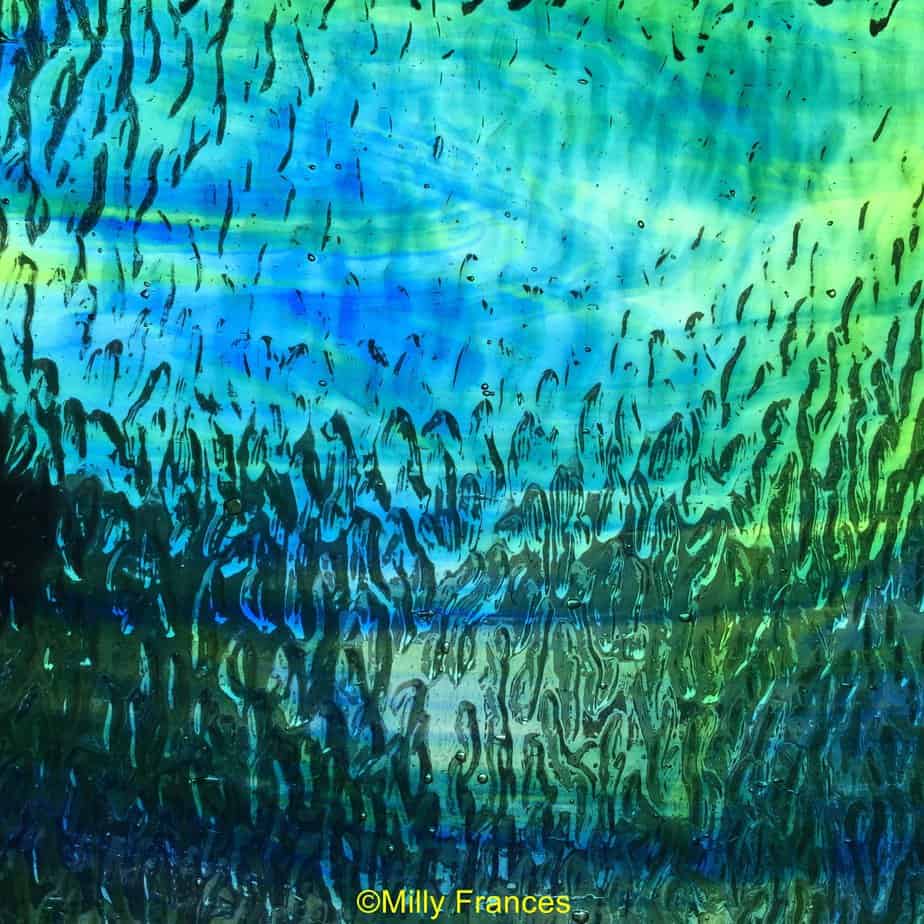
- You can work out the grain direction from the way the pole distorts. If the edges of the pole zig-zag up and down the grain direction is from top to bottom (image 2). If they’re side to side, the grain goes left to right (image 3).
- Have a look at the photos below. I’ve added a diagonal example for you too.

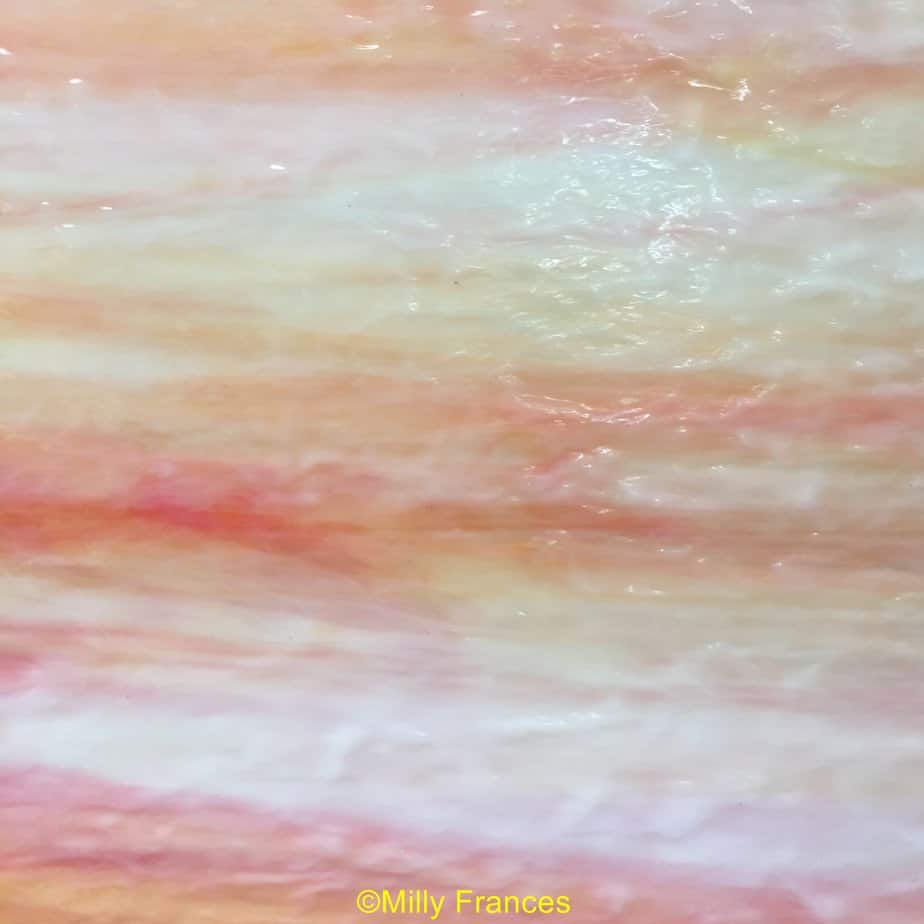
One last thing before I move on from detecting grain direction. Sometimes glass has a textural grain going one way and a colour grain going another. Take a look at the image below. The texture goes up and down and the colour side to side.
Question: Which is the one that jumps out at you first?
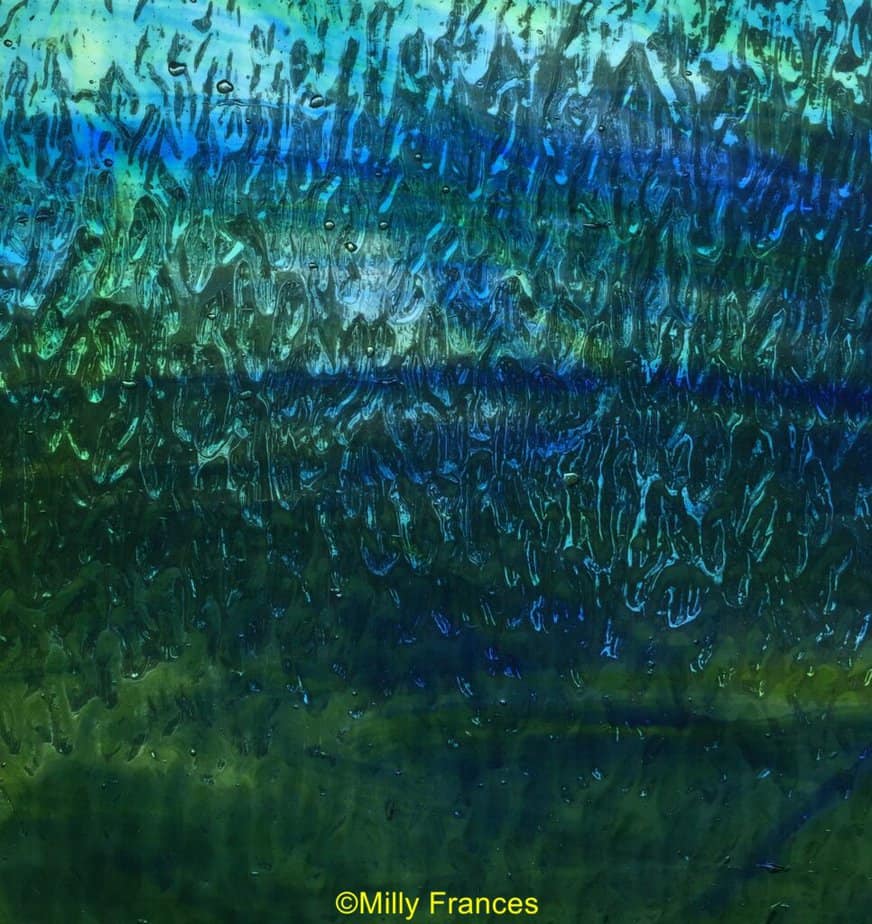
Answer: The colour.
It’s good to remember that colour is always visually stronger than texture. So, for example, if your design flows from left to right, make sure that the colour patterning flows in that direction too. Leave the texture to go where it wants!
Texture will add depth to your stained glass but it won’t make your eye move around like colour will.
Understanding how to choose the right glass for your projects is by far the most important skill to have in stained glass. It lifts your work FAR more than smooth soldering ever will!
And yet it’s hardly ever taught.
My Stained Glass Plating Magic course gives equal time to ‘arty’ decisions around choosing glass as it does to practical details.
If you’d like to learn how to make these crucial glass choices for yourself you can read more about my online Plating Magic course here.
Which Way Should Textured Stained Glass Face?
One of my online students was told that texture should always be on the back of the stained glass panel. Do you agree?
Personally I don’t think there’s a definitive ‘back’ or ‘front’ answer. It’s an artistic decision that depends entirely on where your work is going to end up living.
Imagine where your stained glass will eventually hang. Think about where the light source will come from. Is it bouncing off the front of the glass (reflected) or it it coming from behind and through the glass (transmitted)?
Reflected
If it’s from the front and you want the light to bounce off and ‘dance’ on the texture, then use that side as the front side, facing you.
Transmitted
If it’s from the back you might want to hold your glass up to the light and see how it behaves. Sometimes with deeply coloured transparent glass, the light ‘holds’ better if you’re looking through to the texture at the back and the colour looks deeper. If this is the case, have the texture on the back side.
The two glasses below are photographed in reflected light on the left and transmitted on the right:

Are you amazed at how different the same glass can look in changing light? I go into this in far more depth in my online Plating Magic course, including a Glass Index to enhance your glass choices.
A PROMISE: If you make it a habit to look at the glass in the type of light it’ll end up being displayed in, you’ll see instant improvements in your stained glass.
Other Considerations
If your textured stained glass is for an external window it’s best to have the texture inside on the front to avoid possible dirt collection. It will also catch the light on the front at night when it’s dark outside.
A REMINDER: Whichever side you want your texture on, you’ll want to cut on the smoothest side. So if you want the texture on the front, you have to turn the pattern over before cutting the glass, texture down, smooth side up.
So that’s my answer! There are many variables and most of them depend on what you, the artist, wants. It’s not set in stone and don’t let anyone tell you it is 🙂
Foiling Heavily Textured Stained Glass
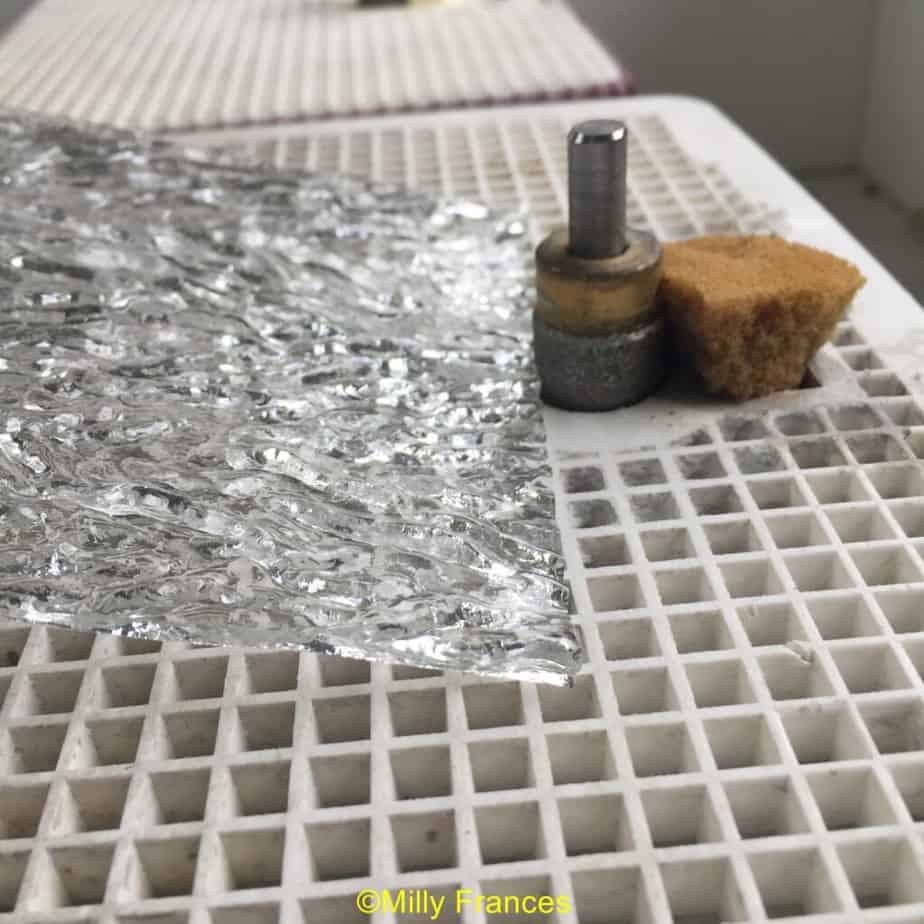
There is a special grinder bit you can buy for textured glass that grinds 1/8″ of texture away. It’s called a ripple bit (sometimes called a bevel bit). It has two grooves to fit different thicknesses of glass.

Alternatively, you can simply hold the glass at a 45 degree angle to a regular grinder bit (see below) This will grind enough of the texture away to enable you to foil more easily.
Cutting Textured Glass
No matter how heavy the texture you should cut it exactly as you do any other glass*. Hold your nerve!
The tendency is to overscore and increase the pressure. Neither will help you.
- Make sure your cutter is oiled and in good working order.
- Wear gloves and safety glasses – heavily textured glass chips has more thin shards.
- Make a practise score on a piece of glass that you know will run properly first.
- Put something soft under the glass to absorb the irregularities of the texture.
- Use some of the scrap textured glass and practise until you get used to making a good score on that particular glass.
* Drapery and similar glass is an exception. These are better cut with a saw.
Stained Glass Sheets – More about glass – this time the types of glass available and what method they’re best suited for.
Glass Saw – If you’re defeated by cutting textured stained glass you can look into saws. Don’t shell out for one without reading about the 5 things they’re really good for – and when NOT to get one!
Do have a look at my Plating Magic course if all this talk about textures, colours and different lights interests you.
I love textures and and regularly flip them backwards and forwards to get the effect I like best for a particular piece. It can be a way to add depth and movement.
Sometimes I want the bumpy edge of a heavy ripple as part of the design — such as on a turtle’s shell — so instead of grinding off the ripples for easier foiling I foil it twice. The first time I focus on getting an even edge on the smooth side. The second time I focus on getting an even edge on the lumpy side.
If the glass is very thick I use 7/32″ both times. If it’s not *that* thick but just has a heavy texture I use 3/16″ the second time around.
Turning the fid on it’s side helps with burnishing the foil securely down into the texture.
That’s a very helpful post, thanks so much for contributing your experience Mary Beth 🙂
I’m having trouble finding glass I need. I call it ripple for it has ripples close together (real close). I use it when I make a Bass it works well for the fins. The color is a light green. I have been doing glass for about 4 years now. I haven’t looked at any glass stores for they are to far to drive to. Perhaps you could direct me to a web site that sells large sheets at least 12×12, or larger. If I may send you a pic of this particular glass I can. Please reply. Thank you
Joe
Hi Joe, if you’re in the US (?) Tiffany Glass and Franklin Glass are good suppliers – email them the photo as they sell glass whereas I am in Ireland and am an online course person, not glass seller.
I hope this helps.
Many wonderful tips as usual Millie! I appreciate the info on ways to determine which side if the glass to use. I was starting on a trout piece. The grain went one direction and the color went the other direction. Can’t wait to cut this piece out! Thank you!
Aw, glad it set you in the right direction Marilyn. That’s great to hear.
Molto interessante, Grazie
All your articles are so helpful but this one was particularly invaluable to me! A lot of my work involves small pieces and I’ve been especially frustrated trying to cut textured glass. I love the effect it adds but have struggled with foiling and cutting it. The tip about grinding at a 45 degree angle is brilliant and will certainly make my life easier going forward! I was already putting a soft cloth underneath for the irregularities and have even taken to warming the glass with a heating pad before cutting because that seems to make the cutting both easier and even on both sides. Thanks for your website and all these wonderful tips!
That’s so good to hear Joyce, thanks for taking the time to add some of your tips too 🙂
Milly, As always these are wonderful tips!!!
Thank you Gail 🙂 I hope you found something of use.
Thank you so much for these tips. They are always so informative and very helpful
You’re most welcome Ilona, thanks for posting 🙂
When using the ripple bit to grind your texture glass does it have less chips on the glass as compared to using a regular bit? Also which groove do i use on the ripple bit. You provide all of us with so much great tips and help with your ideas on thinking about putting the glass up to the light to see how the glass will flow with light,
Thank you ❤️
Hope you are doing well
Sandi miller
You’re welcome Sandi. The groove depends on the thickness of the glass. A brand new bit will chip glass more, whether it’s a ripple bit or a regular one. The textured glass itself can chip more, too, as the bit catches the high and low points. Hence the additional safety glass warning. Good luck, Milly
This information was really helpful for any project. I generally leave the texture side to compliment the rest of the glass e.g textured Centre for a flower. Thanks for the great tips as always!
Bill ;o)
Yes, good point Bill. You can mix and match with front and back, to highlight certain areas in different lights. But you DO need to be on the ball if you do this, with the pattern being face up or face down!
Thanks Milly. Perfect timing as I’m in process of deciding on glass for an abstract for my dining room wall.
I can read minds Lynn… watch out LOL! Glad the article hit the spot for you 🙂
So many helpful insights.
I always love to get your articles because I know I will learn something.
Thanks Karen, that made me smile 🙂
Thanks Millie, I sometimes like if making a beard will have the textured side on front to simulate the real hair. Very interesting and people think if you have been cutting for 24+ we know everything, no this was very informative.
Oh that’s good to know that you’re still learning things about stained glass Joan. I learn all the time from my readers, they’re such a skilled bunch 🙂