How To Make Accurate Straight Cuts & Angles
Cutting lead came for stained glass isn’t as hard as you might think. To make an accurate cut on both sides of the panel you have to cut straight down. This is so that you will have neat lead came angles without any gaps on BOTH sides of your panel.
I’ll show you how to cut lead came accurately before moving on to a 45 degree angle and then one of those long thin angles that everyone tries to avoid!
You’ll find out it’s not so difficult after all.
Lead Came Cutting Tools
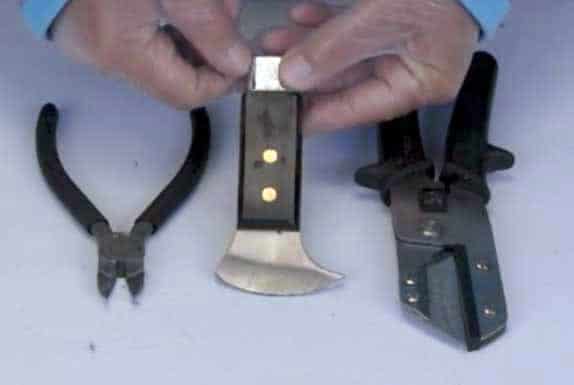
Shaping lead can be done with a variety of tools. You can use:
Lead Dykes, or Nippers
These are adapted from the side cutters that electricians use. They have a bevel on one side only, which makes them particularly useful for cutting lead.
A Lead Knife
This is the most traditional tool and has been used – in a variety of shapes and sizes – for hundreds of years. The lead knives usually have a rounded blade that helps with the rocking motion that cuts through the lead. They have a weighted end that is used for hammering the nails in. These keep the panel in place as you lead. Keep the blade as sharp as you can for the best results.
Lead Angle Shears
These are fairly new to the stained glass scene. They look and work like a pair of scissors. The cutting blade is a general purpose blade that fits into any utility knife.
Saws
They’re normally for those who are making large amounts of lead work. Knives or nippers are quicker unless you’re set up for production work.
Cutting Lead Came Accurately
This short video takes you through cutting 3 types of angles; straight, 45 degrees and long thin angles.
Straight Cuts
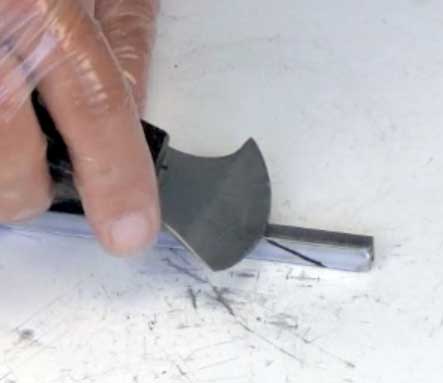
The important thing about cutting angles is to be directly above the cut so that you can press down. This is the way to achieve a lovely perpendicular cut.
- The lead knife cuts through the top of the lead came to make this type of cut.
- Start by simultaneously rocking the knife back and forth while you press downwards
- Once you cut through the top flange you can increase the pressure
- Push down through the bottom flange to cut right through the lead came
- Sometimes the top flange squashes a bit. To rescue this, simply use the corner of the knife blade to ease the flange upwards
- Check that the cut is perpendicular
- If it isn’t, you can take a slither off either flange with the lead knife to straighten it out
That’s all there is to cutting lead came straight!
Cutting Angles
Accurate 45 Degree Angles
- These are the angles you need to perfect for those professional mitred corners.
- This technique is essentially the same as cutting straight down.
- Start cutting the top of the lead, rocking the knife back and forth along the angled line
- Push down at the same time
- Once you’re past the top flange you can wiggle the knife from left to right as well as pushing down. This helps you cut the heart of the lead
- When the lead is cut, use the corner of the lead knife to tease the squashed flange back up
- Finally, check that the angle is perpendicular
How To Cut Your Mitres The Right Length
The trick is to do one – let’s say the top lead as per photos – and then put it to one side, don’t try and do the other one with this top one in place.
Put the horseshoe nails back along the top to hold the top of the glass in place while you repeat the steps for the vertical. That way the one doesn’t get in the way of the other when you’re measuring.
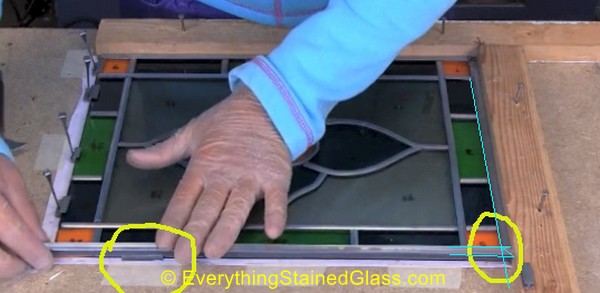
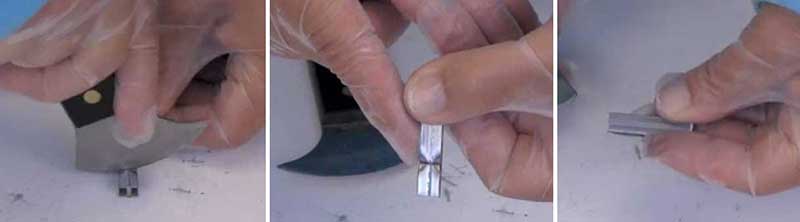
- cut a straight end
- put a small piece of lead/zinc 3/4 along the edge to prop the lead up at the same level so it remains flat
- place along the edge, making sure it’s following the outside line exactly
- mark a diagonal on the straight end.
- cut the lead
- check it’s correct
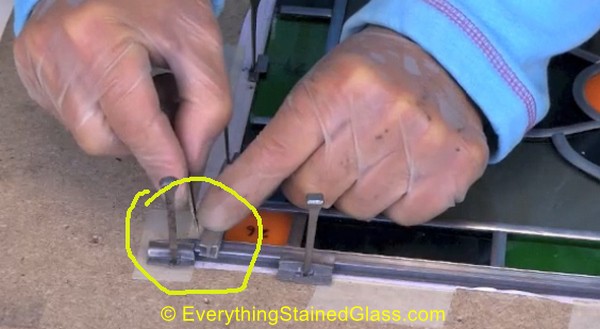
Second Cut
- use a small piece of spare edge lead to prop lead up as per image 1 (it’s underneath the bit I’ve got my finger on)
- using another piece of edge lead, mark either side with a nail
- remove and mark diagonal
- cut and check
Cutting Lead Accurately – Long Thin Angles
Now for those long thin angles!
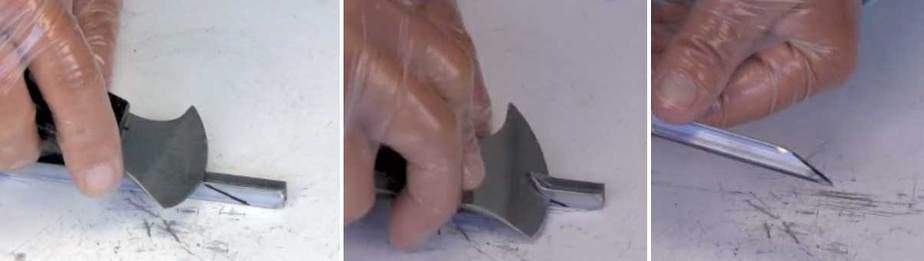
- Mark the angle you want to cut on the top and bottom flanges of the lead came
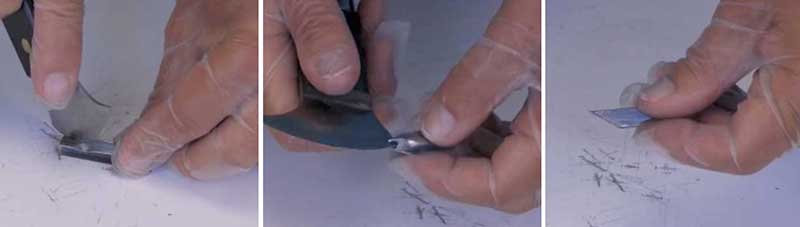
- This time you’re cutting the lead came from the SIDE
- Hold the lead firmly with your non-cutting hand
- Introduce the knife to the edge of the lead and start rocking from side to side and pushing forwards at the same time
- Cutting through the heart of the lead came is harder with these angles as there is more of the heart to cut
- Keep checking both sides to make sure that the cut is following the marked line
- When you’ve cut the came, check that the top flange matches the bottom flange.
Sorted! Cutting lead accurately is now one of your skills.
P.S. The video and stills are taken from my ‘Leaded Stained Glass Artistry’ course. It’s aimed at beginners and refreshers and takes you through a starter panel. It’s full of extra tips to develop your leaded glass skills. Click to See if the course is right for you here.
Thanks very much for this. The mitered corners are especially useful for me this week.
You’re welcome Martin, good timing 🙂
Millie,
I love your videos. I just learned how to place lead came around a stained glass window panel.
Thank you for all your sharing and we really do learn from them.
Thanks for the encouragement Terry. I’m very happy to hear my videos help you 🙂
Milly,
Thank you so much for sharing all of your skills and tips with us. I’m improving on each project because of your videos. I may have missed your tutorial on “cementing” the glass. Not sure that’s the correct term.
I’ve used equal parts of boiled linseed oil and turpentine, whitening (plaster of Paris) and black powder coloring. Where can I see your tips on this?
Again, thank you
Donna
My cementing tutorial is here Donna. The whiting needs to be chalk dust, not plaster of Paris.
I’m glad you’re finding my tips of use.
Thank you so much for the e book.
You’re most welcome . Thanks for taking the time to email me. I’m glad you liked the Frank Lloyd Wright. His work is pretty special!