This is the second of three videos exploring Stained Glass Plating (layering). The first video concentrated on the ‘big names in plating’, Tiffany and Robert Oddy, showing how they used plating to bring their stained glass alive.
You can see #1 Video here if you missed it.
#2 Video breaks the plating process down into small, manageable pieces so that you can:
- see how it’s done and
- understand that you can achieve all the wonderful effects with just 2 layers of glass.
Plating doesn’t have to be 5 layers of glass thick, weigh a ton and take a year to make!
If you’re thinking your current skills can’t possibly be good enough to master this technique, have a look at this checklist:
- You can cut glass to a pattern
- You can solder a foiled panel together to a pattern
- You know how to clean and polish
Are you surprised at the list? I bet you thought it would be way more difficult. Chances are, you already have the skills to give this technique a try and are ready to discover effects not found in a single layer of glass.
Once you get started with all the colours and effects it’ll be hard to imagine doing stained glass in flat panels ever again.
I hope you’re now inspired to give plating a try yourself?
FIND OUT MORE ABOUT the PLATING MAGIC course here
“It was almost magical watching the class videos as I got to see how two different ‘normal’ panels went together to create depth and texture, shading, interest and beauty in a way that just isn’t available outside of plating.” Stephanie Klenka Mitchell
I’m glad that you addressed spot plating. My first question was going to be if you had to make a full second panel — which would double the price of the piece at a craft show, well beyond what people would expect to see for a piece of that size.
Thank you.
Yes, that is a consideration Mary. There are times when a whole new layer is the most sensible, taking into account the strength of the finished panel. You could always use window glass for the unplated areas if this was the case.
Thank you.
We have learned to keep a supply of window glass handy for what I call “structural clear” — those fill-in places around pointy edges in sun catcher designs. I’ll keep it in mind to use here when figuring out my first plated ideas.
I do not work with stained glass. I found your website while trying to solve a perplexing mystery, which I wondered if you might help solve!
I purchased a lovely, six-sided, stained glass lamp, second-hand. I did not see it illuminated by a light bulb before buying it. It has a geometric pattern, consisting primarily of larger horizontal white strips of wavy, slightly mottled, milky white glass, alternating with thin strips of colored glass, and with a vertical strip of colored rectangles and triangles running down each of the six sides. When I turned on the lamp I discovered that the mottled, milky white glass is essentially opaque (I can barely see even the shadow of my fingers behind it) and with the light bulb on, the milky white glass looks like a mottled brown color and sheds a minimal amount of light! The colored glass, on the other hand, is very nearly transparent. It seems like the milky white glass might be thicker than the other glass. I wondered if the milky white glass is layered, so I started sleuthing on the internet, found the term “plating,” and then landed on your website.
I wonder if you could shed any light (so to speak) on why the mottled, milky white glass looks brown when there is a light bulb illuminating it from behind? I would be so grateful for your observations and insights! Thank you in advance, Milly!
Lots of sleuthing and good questions there Aviva 🙂 It’s not plated as it’s just one sheet of glass (plating means layering of two or more glasses to create certain effects)
The semi-opaque (translucent) glass has coatings in it to add colour and density. This prevents the eye from passing straight through and arrests it on the surface. Good for lamps, as you’ve found out, as they diffuse light and you don’t get that horrible bulb of light shining through.
I have a page on different types of glass here: https://everythingstainedglass.com/stained-glass-sheets
White opaques and translucents always have that brown tint with light behind. I don’t know the science of it, sorry, but I wish it didn’t happen as I don’t find it very pleasant.
I hope that helps a bit. Enjoy your lamp 🙂
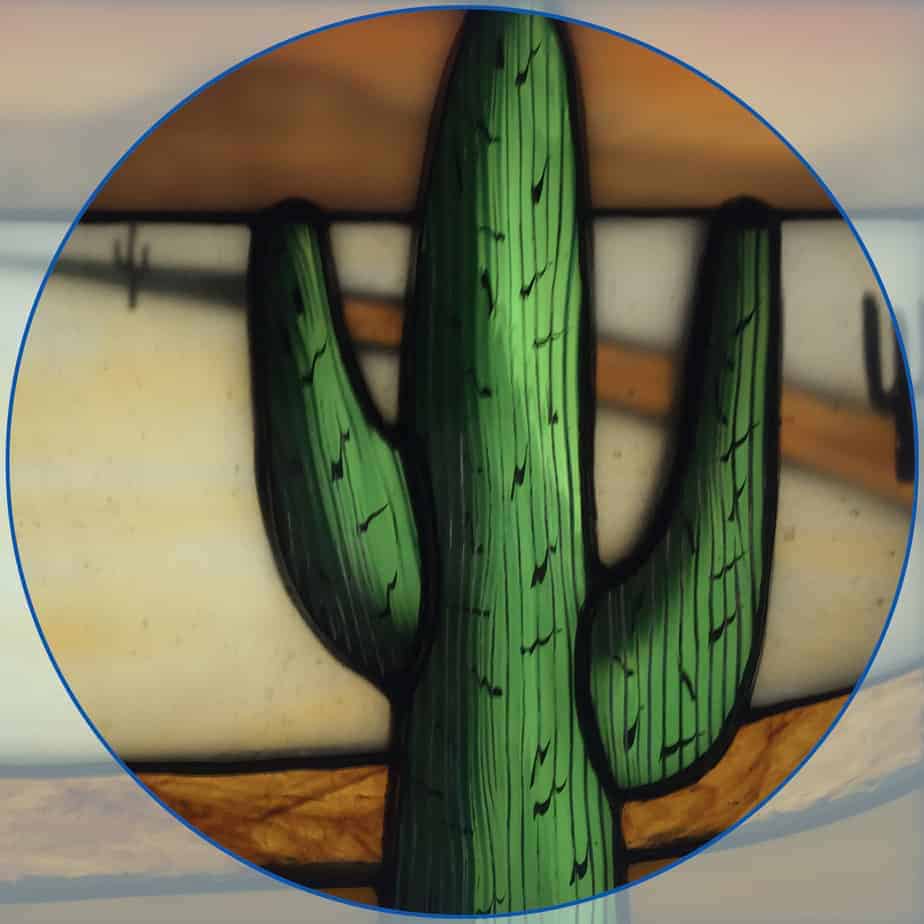
I love your videos! Now I know how you do plating but what impressed me the most was the cactus that you spot plated! That was stunning! And the painted needles. What kind of paint do you use for that? You inspire me to try new things. Thanks!
That’s exactly what I was hoping with my Plating Magic course Katherine; that you’d be inspired to try new things. I use Pebeo 160 in this one.
Hi Milly,
Thanks for all the wonderful information. I think it would help me to be able to see each of the layers side-by-side (and then a view of both layers along with the finished product all at once) instead of switching images back and forth. You showed that at the end of the video when the third layer of the cactus was added and that was helpful. But I think if I had a chance to study the two initial layers side-by-side, I’d have a better understanding of how it all works. Also, I’d like to see what the piece looks like when it isn’t on a light box. The light conditions of any piece’s final home can certainly be a consideration when selecting which glass to use. Plating seems to add yet another dimension (no pun intended) to the issue of glass selection and potential light conditions of the display space.
Thank you for this and all the other useful things you so generously share with us!
Thanks for your ideas for teaching Vicki. The full Plating Magic course explores and explains everything in more detail.
I totally agree regarding glass selection in situ – another area that’s delved into in the course 🙂
désolé je ne comprends pas votre langue j’aimerais que vous le mettiez en francais
Merci pour la suggestion de traduire mon site en français, je vais me pencher dessus.
En attendant, j’utilise Google Translate pour écrire ceci !
Thanks for the suggestion to translate my website into French, I’ll look into it.
In the meantime, I’m using Google Translate to write this!
Hi Milly, This sounds like fun and opens up some wonderful options.
You posed a question in response to a previous comment – you asked if the word “class” implied a one video session. In my opinion, it does. To me, a course is a series of classes. These classes are all in one area of study.
And because I’m the nerd around here, I found this description useful.
https://www.uopeople.edu/blog/class-vs-course/
Ok, I’ll go back to my glass room. 🙂
Thanks for the clarification and the link Elizabeth; I’ve changed all my wording now!
You’ll definitely discover options galore with plating 🙂
Milly,
I do glass on glass mosaics. Would would plating work for that? Thanks!
No, the techniques I’m covering in this class are for copper foiled stained glass Laurie, sorry.
Thank you!! I do enjoy your newsletters and videos!
You’re most welcome Laurie, glad you find them useful 🙂
Can hardly wait Milly! Thanks for creating this class!!
You’re welcome Diana, nice to hear from you and happy to know you’ll be plating in the future. You’ll love it!
I watched the video, unfortunately I had no volume. I will continue to watch. Love your videos. Thanks.
Thanks Monette. There must be a volume slider turned down or off somewhere on your computer. If you can’t find it, try rebooting the machine, that sometimes helps. The videos all have subtitles; click on the CC button, bottom right – and choose your language! At the moment we have English, Spanish and French.
Hi Milly! As always, you have given us something that looks like fun, I want to sign up and will do so on the 14th. I do have a question, once I pay for the class, will I have access to it at a later date? To watch it as often as I like? Is it only one class or a series of classes related to plating?
Thanks Milly
It is SUCH fun, Anne. That about sums plating up! Yes, you will have lifetime access and you’ll be able to watch all of the videos as often as you like. It’s a full course – 24 close-Up Videos and 9 Slideshows, 3 Workbooks and 9 follow-along Crib Sheets to print and exclusive access to a Searchable Glass Index. There will be a full Curriculum on the site on Sunday 14th.
I hope that answers your questions.
Can I ask you a question? When you hear the word ‘class’, do you understand it to mean just one video lesson? I’m worried that people will think Plating Magic is just one video!! Thanks for any clarification.
Hi Milly, this may be a silly question but can you use this technique with lead came or is it only really suitable for copper foil. Thanks for for a great tutorial, I am now getting a mixture of ideas floating through my mind – that tends to happen when you are 70
It’s not a stupid question John, thanks for raising it. You can plate with lead but it’s a different technique. You have to use high heart lead and seal the pieces of glass together before leading.
I’m doing the whole panel and soldering together here.
It’s fantastic that you’re having lots of ideas, that’s what I like to hear 🙂
Very cool. I’m eager to give it a try. It really take a piece from two dimensions to three dimensions. Thank you for the introduction.
You’re welcome Linda. I’m happy that you can see the potential of it and are ready to give it a go 🙂
Can you plate over a leaded piece and if so, would it be with copper foil?
You can’t Joni. You can plate with lead (see my answer to John above) but not over a panel that’s already made.
Thank You Milly! My head is “buzzing” with ideas…Can’t wait til Sunday to sign up, and learn some more creative ideas from you and the other students.
Brilliant Deb, you’re going to LOVE it I know 🙂
Loved this intro to plating and spot-plating. It really helped me better understand this technique, but a more detailed tutorial would be wonderful. Exactly how did you pull off each layer … choice of glass for the added blurred distant foothills, etc. Just a walk through of you building a piece. Lastly, is the spot-plating painted on and if so does it then go to a kiln?? Obviously, I still have technique questions …. but I loved this tutorial and I love your work. Jim
P.S. I’ve been building windows since the 80’s and have really wanted to learn this subject. I just need more step by step guidance.
Jim, absolutely ALL the answers to your great questions are in my Plating Magic online class. Many videos, crib sheets, slideshows, painting, foil overlay – no stone unturned! Step by step and a walk through – that’s exactly what you’ll get in the class. I really hope you’ll go for it – you’ll love it I’m sure!
The class opens Sunday at a special introductory price – you’ll get an email as you’re signed up to my Newsletters.
Thanks for this, my mind is a flurry of ideas! what’s also good is that I am now revisiting older designs/ideas I abandoned and looking at them in a new light.
Oh that’s brilliant Adam, you obviously have a ‘plating mind’! 🙂
Your instructions are always so clear and concise. I have been enjoying glass for over thirty years and you continue to inspire me as I read and listen to your emails. Thank you for sharing your skill and love for glass.
That’s nice to read, thanks Harriet. I hope you’re inspired enough by plating to want to give it a try yourself.
Milly, I am excited to try this, but after seeing both videos I still don’t know how it works, Do u have to cut out all the pieces the second time and solder over the first ? I am afraid the heaviness would tear the foil away. Will u be making something on line from scratch. It looks interesting but I am very confused with how it is done
Good questions Judy, thanks. You’ll be amazed at how strong it it once assembled.
Yes, my online class covers this cactus project from right from scratch, showing how to do each stage.
I spend an equal amount of time concentrating on glass selection and combinations, as this is the REAL art of plating and the fun bit 🙂 I hope you decide to give it a try.
This is a really cool process. Two questions on your project: Is the sky/mountains at the top of the panel also three layers? What’s the process to keep the layers together?
No, the mountains are 2 layers only – as is everything in the left hand desert landscape panel and ONLY the cactus itself in the final panel is 3 layers.
My online class that opens on Sunday, Valentine’s Day, will take you through each and every process you need to make this plated panel.
Good questions Carmen, thanks.
Very interesting stuff, not ready to tackle it yet. Have to look for some completed works in this area to get the full impact. Thanks Molly!
Warren.
I think you might be surprised Warren. If you can cut and solder to a pattern then you have the skills to give plating a try, no problem.
I’m a bit unsure about what you mean about ‘complete’ as the cactus panel is complete. Apologies if I’ve misunderstood you.
Did I miss a step? I see that you have made two panels, how do you connect them to avoid the dust/ bug problems? Wide foil all around to connect them as one piece? Looking forward to hearing from you! I enjoy your newsletter and tips!
I show all of this in video detail in the online class that opens on Sunday 14 Feb Kathy. Once assembled it’s a lovely robust sealed unit.
The fascination of the plating process comes with the infinite glass combinations – the class explores lots of them but you’ll find many many more 🙂
How are the 2 or 3 plates of glass connected?
It’s all coming up in the my Plating Magic class Cheryl 🙂 I’ll take you through every single step. The class is available from this Sunday, 14 February.
In plating, how do you connect the layers and also how can they be framed!
It’s all soldered together in a very strong, sealed unit Debbie. The framing is accounted for too. I explain every single last step of the process in my Plating Magic class which is available this Sunday, Valentine’s Day.
I hope you’re inspired enough to give it a try 🙂
Thank you Milly, you have certainly given me something to think about. Happy Glassing!
You’re welcome Judith, things that make us think are good… When I was filming the class it made me think, too. All those glass combinations and how they work together to create the effects. It’s a bit mind-blowing!
Great videos. I love the idea of the technique. How do you mechanically join them together.
Soldering Frank. In my Plating Magic class I show all the steps to make this desert landscape panel. I’m imagining it’ll be a stepping stone for you to start finding your own glass combinations and effects.
Thank you for the videos Milly. This has got the wheels turning! Very interesting to think about the various combinations possible. Not sure I want to cut twice as many pieces for every job but I do think there are many opportunities for spot plating in pieces that I have done.
Wheels turning is good Ken 🙂 I understand about the double cutting but there are ways you can reduce this by minimising the amount of pieces in the top layer (for example the second desert panel has far fewer pieces in front). The effects achieved outweigh the extra effort in my view.
Spot plating has it’s place for sure. I personally love the unified look achieved with this whole layer approach. I don’t know what you think but sometimes if there is only one area of spot plating in a panel it can sometimes upset the balance of the piece. It has to be done thoughtfully but it can add a lot on its’ own, certainly!
Millie, you are amazing. I read all your emails and learn from them. Thank you so much and keep sending them. Love the glass. This plating is amazing!
Yay Terry, so glad you’re inspired by it. I really hope you dive in and give it a try. It’s such fun 🙂
That looks amazing, and it’s so clearly explained. I’m inspired to experiment with layers, in plating…. it made the cactus so strong and visually rich. Thank you for sharing. One query…. do you hold the layers together with a frame.. or tack solder? And the spotlight plating, I wasn’t quite sure how it was attached… ? So interesting… thanks again Milly.
All good questions Jane and all thoroughly answered and explained in my Plating Magic class. It’s soldered – no glue – lovely and solid and sealed.
The class is available from Sunday 14th Feb. I hope you’ll give it a try 🙂
Lovely tutorial! Thank you.
You’re welcome Eileen, I’m glad you enjoyed it. It really is a beautiful technique that adds SO much to a panel.
Hello, I am so looking forward to this “new” technique! I am at that point in my work trying to get more from what I’m envisioning in my head. Thank you already😊.
Oh yes Judy! From what you’ve written here you’re exactly in the right place to take your work further and experiment with plating. You will love it I’m sure 🙂