Stained glass lead soldering is FAR easier than soldering copper foil . The main reason for this is that you are only soldering a small area each time rather than along a whole seam.
Think cake decorating; it’s the difference between piping a whole border and piping a Swiss dot.
If you’re new to using lead came as a technique I would highly recommend you give it a try. It will add a great deal to your skill set and give you the best of both stained glass worlds – foil and lead.
If you don’t have a local class my Leaded Stained Glass Artistry course has taught many people – even those who have never used lead before – how to make a stained glass panel using lead came. The course is self-paced and online so you can learn this lovely technique even if you are unable to get to a class. You can find out more about it here Leaded Stained Glass Artistry.
Stained Glass Lead Soldering In Easy Steps

1. Tools and Materials Needed
Soldering Iron. 50/50 Stained Glass Solder. Lead Came. Soldering Iron Holder. Natural sponge to clean iron tip. Wire Brush. Old Toothbrush. Flux.
Notes on tools:
- Soldering Iron. I use either a Hakko FX-601 set at 360C or a Weller 100 with a standard 7 tip (700F).
To check the Weller tip temperature: Unscrew the soldering iron tip and check the number on the end. 7 = 700F, 8 = 800F. 8 is too hot for stained glass lead soldering. It is for copper foil soldering. - Solder. 50/50 solder is most often used for soldering lead came. You can use 60/40 but you have to work quicker or turn the heat of the iron down.
- Flux. Tallow, liquid or paste will all work.
2. Stained Glass Lead Soldering – What To Aim For

A stained glass lead solder joint should:
- be a strong union between the lead came and the solder. To get this make sure that both metals heat up during the stained glass lead soldering process.
- contain enough solder to join both pieces of lead together successfully. They can be flatter or slightly raised. This is a question of what you prefer.
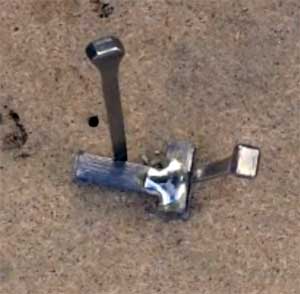
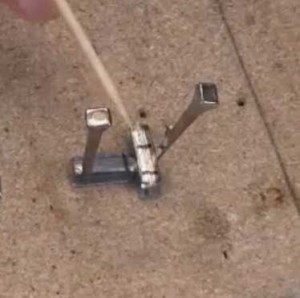
- create a T-shape and be a tiny bit wider than the width of the lead came
The ‘Leaded Stained Glass Artistry’ course is full of extra tips and advice to develop your leaded glass skills – Click to see if the course is right for you here..
3. Getting Started With Stained Glass Lead Soldering
Friendly safety reminder: Always ventilate the room when you are stained glass lead soldering. Wear gloves when handling lead came.
- Firstly, clean all the lead joints thoroughly with the wire brush
- Check that all the lead is still in place and hasn’t moved during the cleaning process
- Immediately flux each joint to prevent oxidation
- Turn the iron on and test if it’s hot enough. To do this, put a small blob of solder on the heated tip and turn the tip over. If the solder still stays on the underside of the tip your iron is hot enough. If it rolls off, it’s too hot
- Hold both the solder and the iron tip over the joint
- For beginners I recommend melting a blob on the joint first with the side of the tip
- Then turn the tip so that it’s flat on the solder and hold for a few seconds until the solder is melted and shiny
- It’s a fine balance between making sure there is a good union between the two metals (solder and lead) and not melting the lead came! Practice on some scrap bits first to get an idea how long you should leave it
- Finally, Do NOT ‘iron’ with the soldering iron, keep it still! You don’t want to spread the solder too far and make an unsightly mess

4. Finishing Up
- First of all check you’ve soldered all the joints on side 1 (I bet you miss one!)
- Clean the flux off each joint with a toothbrush or similar
- Carefully turn the panel over
5. Stained Glass Lead Soldering – Side 2
- There may be some small gaps where the lead came doesn’t butt up to the adjoining lead or if the angle is incorrect. Fix these by cutting some small slithers of lead came and inserting (balancing!) them in the gaps.
- Take care when you flux these slithers of lead filling a gap. Brush the flux on VERY gently – or grate some tallow on to the join if you are using tallow – otherwise you’ll dislodge the slithers.
- Repeat the steps in 3. above
- Drop a tiny blob of solder rather than press it on the joins which contain ‘filler’ pieces of lead. Wait for this blob to solidify first. This keeps the fillers in place while you add more solder and heat the join as normal.
6. 3 Ways To Rescue Mistakes
Watch this short video to see how to rescue 3 common ‘YIKES’ moments that often happen when stained glass lead soldering.
It finishes off by showing you how to create a perfect solder join with lead came. Good luck with your soldering!
P.S. The ‘Leaded Stained Glass Artistry’ course is full of extra tips and advice to develop your leaded glass skills – Click to See if the course is right for you here.
7. Finishing Up
- Check you’ve soldered EVERY SINGLE joint. It’s very annoying if you miss one!
- Use a toothbrush or stiff brush to clean the flux off each joint
Now you’re ready to go to the next stage – Cementing Your Panel


Hi Milly,
Thanks for sharing your knowledge and expertise to help others learn! I agree with all the other positive comments!
I have some “used” lead I removed from a broken leaded window, can I use that if I clean it up to practice soldering joints like you showed in your video? How would you clean it up? Thanks!
You’re welcome AA. Yes you can if you clean it thoroughly with a wire brush where you’re about to solder. Use a mask and make sure you get it clean enough.
Whilst wanting to encourage recycling, I’m a bit worried that it won’t give you a good idea of soldering lead as it it sometimes tricky to get old lead clean enough to take solder. Bear this in mind, give it a go but don’t be put off if it’s too tricky, find yourself a bit of unused lead and keep going 🙂
What am I doing wrong.? I’m trying to solder hooks on the leaded frame of a piece given to me.
I fluxed both surface and hooks but solder sticks to hooks but not the leaded frame caning. I used 60/40 and tried some with more than 62’% tin
Have you thoroughly cleaned the lead Martha? That’s normally the key with old lead – it’s too dirty (even invisibly) to take solder. Try wire brush and if that doesn’t work, scraping off the top layer with a craft knife. You want to reveal the silver of the lead. Good luck.
Thank you for your very useful tutorials! I wondered, have you ever tinned lead came with a tallow only? I am using the smallest profile of came for my current project, which requires smaller iron tip than standard, but as I hear may also compromise integrity of the piece, if not completely tinned. Were you able to create smooth lines with tallow only? What temperature would you use for your iron? What would be the best way to clean the tallow off such a large area before cementing etc?
An interesting question Aneta. I never tin my lead came. Most people don’t these days. If I were to do it I’d do it at the lowest temperature possible so that the lead doesn’t melt. Use some scrap to practise on.
If you think the medieval stained glass hasn’t been tinned and has lasted 800+ years, you might be convinced that the integrity isn’t compromised.
Good luck if you give it a try.
I have a whole box of over 50 8’long pieces of lead came. It is not double channel. It is single channel. Can this be used in a project or just on the outer edge?
Just on the outer edge Patty.
What are the best hanging rings for lead came?
It depends on the size of the panel Teri. If it’s a small panel you can use tinned copper foil to make a hook as per this page: https://everythingstainedglass.com/stained-glass-instruction
Always attach the 2 hooks (never just 1) to a place where there’s a joint.
If it’s a bigger panel you’ll need to have ‘tails’ on the hook which are soldered along the length for additional strength.
You can add the type of chain you prefer to the hooks.
I hope that helps.
Hi Milly. I’m hesitant to work with lead came, sink and hobby came. I’ve worked a little with lead came but I’m getting confused between lead and zink. Do you have a video of any of these? Thank you. You’re one of the few instructors that actually gets back with me. Thanks again..
Hello Deana, you can’t bend zinc without a came bender and it needs a saw to cut so I only use it for framing. I use lead came in the interior of the design. I have a course for beginners/refreshers in Lead Came here (it assumes you can cut glass) https://www.everything-stained-glass-school.com/p/lead-stained-glass-artistry-1
I also have a page here on framing with zinc: https://everythingstainedglass.com/stain-glass-how-to
I hope that helps.
I want to thank you for your great tutorials. Your videos are clear, focused and deal with one thing at a time. (Unlike the class i took.) It’s so generous of you to share your knowledge. Just want you to know that someone in Canada is loving it. Cheers.
Hello Joan in Canada 🙂 Thanks for your comment and I’m glad to hear you find my tutorials of help, it makes ‘teacher me’ happy 🙂
Thanks for the lead soldering technique. It is a great help. Marg
Glad it helped Marg, and good luck with your future soldering 🙂
Can you please tell me what kind of flux you use. I work with a couple of friends and we are having trouble with flux.We used to have a gel flux but can’t get it any more. The water based stuff just doesn’t do a good job. Your help would be appreciated. Also used tallow but this makes the solder thick and difficult to make a smooth line.Thanks
For beaded seams (foil work) I recommend Ruby Fluid Flux and for lead work I use tallow. I wouldn’t use tallow to run a bead, I can see why you’re having trouble.
I hope that helps and good luck!
Thanks Milly,
I now know where I was going wrong. Looking forward to trying a lead item now.
Thanks gain. Ann
Oh that’s good Ann. It’s always nice when you get that ‘aha’ moment and can move forward. Good luck with your lead soldering.
Thanks Milly
I am enjoying your videos and love your humor!
Thank you very much
Mishell Ivy-Rose
Glad to hear it Mishell, thank you 🙂
Thanks, Milly! Your video makes me want to do more with lead came, but the techniques are also helpful with soldering borders for copper foil projects. Mine always seem to be bit of a mess…You may have just solved my problem.
Where can I buy the stick solder you were using in the video?
Yes, this should help with any lead came soldering, fingers crossed for you! The sticks are European but there’s no difference between them and the rolls in North America – except the width. No blaming your solder now 😉