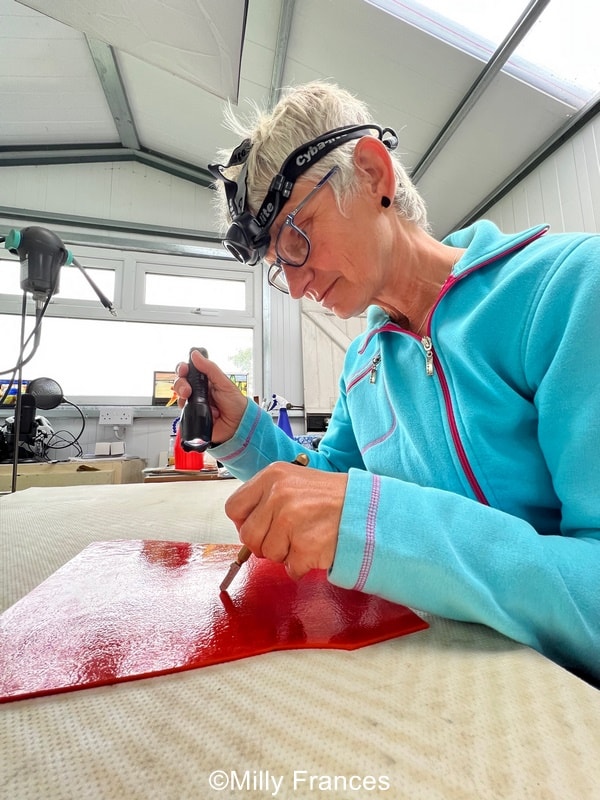
Sometimes I’m so absorbed in making stained glass that I only become aware that my back hurts after I stop. I know I’m not alone in getting aches and pains making stained glass. I have had similar comments from many of my students.
Do you suffer from aches and pains when you’re making stained glass?
It’s very common to experience stiffness and soreness after a long day of working on your stained glass projects. Anything repetitive or intense can cause pain; for example, sitting at a desk on a laptop all day or long days spent gardening. The secret is to head off problems before they start. Practising a good set of habits and routines will help prolong your stained glass enjoyment.
Here are some simple solutions that may help you. These ideas are from my own personal experiences and those of my students in the Stained Glass Hub (my student community on Facebook). Remember that this is generic advice and not tailored to you as an individual. Any specific problems that worry you need to be talked over with your doctor.
Your Posture Does Matter
Neck, back and mid-back pain is commonly caused by sustained or prolonged posture. This is not always poor posture either. Sometimes just simply sitting or standing in the same position for too long can cause issues.
Here are a few tips to help alleviate the discomfort and keep you feeling your best.
Take Frequent Breaks
Taking regular breaks is the single most important thing you can do. Breaks are so vital as any posture held for too long will eventually start to hurt. I know, I know… once you get absorbed in making it’s very hard to remember to move. We’ve all done it 🙂
- Set a timer on your watch or phone to remind you to move. When it beeps, have a bit of a stretch and change your posture regularly. This might be as often as every 10 minutes but you need to tailor the timings to suit your needs.
- Try to think about your body and maintain awareness while crafting. Focus on your breathing and bodily sensations to prevent unconsciously adopting poor postures.
Think About How You Arrange Your Workshop
Arrange your workshop to support your body as much as possible.
1. Work Surfaces and Tables
Ensure that your work surface is at an appropriate height for you. An adjustable sit/stand desk or putting blocks under the legs of the table may help you get it right. Remember again that shifting posture is really important, so a height-adjustable or sit/stand workbench would be the best solution. A lot of the sit/stand desks I’ve looked at are designed for computer use and are a bit lightweight so make sure you get one that’s sturdy enough.
Alternating between standing and sitting is even better for avoiding aches and pains when making stained glass. Perching stools that you rest your bottom on when standing may be helpful. This one on Amazon is an example but there are lots of others choose from.
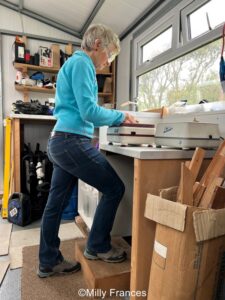
If you prefer standing, try resting one leg on a small block or stool to help change the weight distribution.
A simple and inexpensive idea from one of my students is to lay a couple of stacked 2×4’s across the floor beneath your work table. Rest first one foot and then the other on the stack as you work.
I made a couple of robust wooden boxes at different heights for this purpose. By resting my feet on them one at a time or standing on them to lower my work surface I keep my body moving.
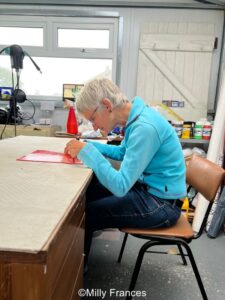
2. Chairs
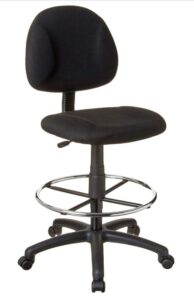
Investing in a decent adjustable chair is really important. Some students use drafting chairs which are like office chairs but taller (Amazon Link). They allow a greater height which may help with mid-back and neck pain.
Here are some simple changes you can make to your current chairs:
- Add a rolled-up towel in the lower back area. This helps keep your mid-back and neck a bit more upright
- Purchase a ‘wobble cushion’ (Amazon Link). This lets you shift your pelvis forward and backwards in the chair, making sitting a bit more unstable. This encourages you to use your postural muscles more and ensures you don’t get stuck in one position.
- A gym ball has been suggested but I think it would be too low and too unstable with cutting and soldering happening. I can spot trouble 🙂 You need to be stable enough to be safe.
3. Thinking Longer Term
Try and improve your strength and flexibility generally.
This might seem strange but what you do when you’re NOT in your workshop plays a big role in how you feel when you ARE in there working.
Improving your general flexibility with stretch exercises like Yoga or Pilates can help enormously. I use a Yoga app most days to help me stretch and bend. It doesn’t have to take hours; even 10 minutes a day is helpful.

Try to maintain your general fitness with cardiovascular exercise. If you are getting a bit older (like I appear to be, lol) make sure you are doing some resistance or weight exercises to build muscle.
You could develop a short routine of personalised stretches for yourself that you could do in your breaks. Think about some lower back, neck, wrist and shoulder exercises. When I worked in an office I took my juggling clubs in. I was so bad at it that it kept me bending and stretching and pretty fit 🙂
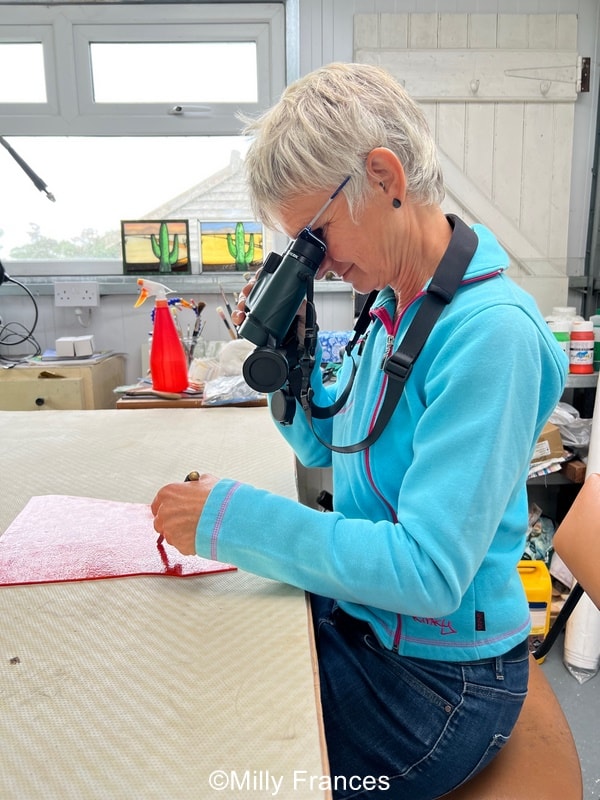
Vision and Eyes
Lighting
It’s essential that your workshop is really well-lit. Good lighting helps you maintain a comfortable posture and reduces strain on your back and eyes. It sounds obvious but don’t forget to maximise any natural daylight when you position your work surfaces.
The easiest solution is to purchase a good desktop light. If your eyesight isn’t so good you could add a magnifying area to help you see clearly (Amazon Link)
For more major changes you could install ceiling lighting above your workbench.
Grinder Lighting Suggestion
If your grinder doesn’t come with a suitable light there are adaptations you can make to improve it.
Student Beverly Whitbeck used a small LED aquarium light made for fish tanks (Amazon Link) The light is less than half an inch thick. She simply clamped it onto the eye shield with a big clip. She made the water shield behind the grinder out of foam board and hot glue.
The light is very bright and illuminates the work area perfectly. Ingenious, thanks Beverly.

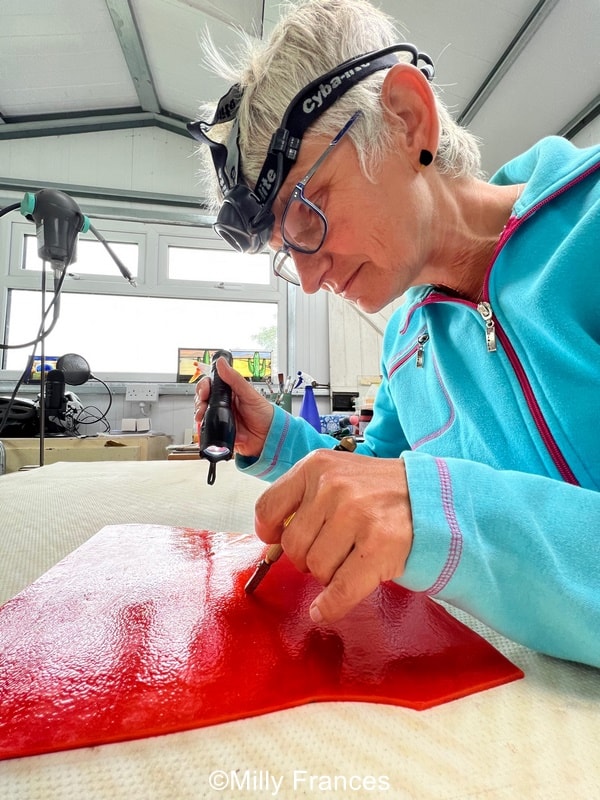
Cutting Glass With Painful Hands
Lots of us have arthritic fingers and wrists. This can make cutting difficult.
- Cutters. You can purchase many different style cutters to ease the situation. You really need to try them out to see which suits you. Many of my students like the pistol grip but others find it too awkward. Others really love the Toyo Custom-Grip Supercutter – I too prefer this cutter. It gives a different type of control than the pistol grip if you have problems gripping (Amazon Links)
- Focus on the correct glass-cutting technique. Ensure you’re using a glass cutter with a sharp, high-quality wheel. Hold the cutter firmly but not too tightly, allowing it to glide smoothly across the glass surface. Don’t go too fast – cutting is a balance between speed and pressure. If you press harder you have to go faster. Conversely, a lighter pressure means you can go slower. I have a page on cutting techniques here.
- Maintain a neutral wrist position while cutting. Avoid excessive bending or twisting of the wrist, as this can strain the muscles and lead to discomfort. Move your whole body and arm rather than just your wrist. A wrist support or brace may provide added stability. They have a rigid pad underneath the arm. They’re meant for carpal tunnel syndrome and there are lots of different types so you may need to experiment to find one that may help you. (Amazon link)
- An overly tight grip can lead to hand fatigue and pain. Apply consistent, gentle pressure while cutting rather than forcing the cutter into the glass. Experiment with different levels of pressure to find what works best for you.
- Do some hand-strengthening exercises to improve grip strength. Simple exercises like squeezing a soft stress ball or using hand exercise devices can be beneficial. These spring-loaded grip strengtheners are good, they come in different resistance levels so you can get the right level for yourself (Amazon link)
- Ensure you’re cutting glass on a proper cutting surface, such as a cutting mat or a specialised glass-cutting surface. The cheapest option is a hard carpet or lino. Self-healing cutting mats are good too as they have a helpful grid for straight lines as well as being slightly cushioned.
- You can also try a more radical change and invest in a Cutters Mate. The Gomms have reviewed one here. It might be the answer if you have very sore wrists and hands. (Amazon link)
The video shows a beginner setting up the Cutter’s Mate and using it for the first time. Someone in the comments said it was painful to watch because it’s a bit muddled but I thought it was really helpful seeing someone get started. There is nothing slick about it to begin with but it does give you a really good impression of how it works and some of the pitfalls. With practice, this might be the answer for many of you with sore hands.
There are different sizes available so be sure to purchase the size that suits your work best.
Painful Feet and Legs
Even if you’re alternating between standing and sitting you may still get sore legs and feet. One of my students wears supportive shoes and has invested in anti-fatigue mats. (Amazon Link).
These are foam-type mats which help you avoid getting stiff and sore making stained glass – they are stable enough to stand on but softer than a hard floor.
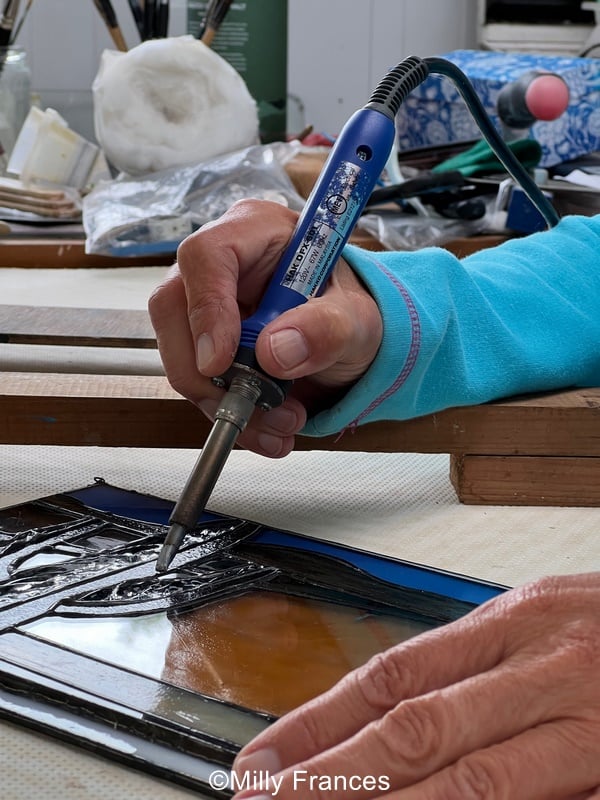
Tremors and Shaking Hands When Soldering
This is a very common problem. Sometimes age alone makes it harder to keep our hands steady but there are also additional problems like Stroke and Parkinson’s disease. These can lead to difficult tremors.
Sadly there’s no quick fix for these but there are lots of things you can try. One of them may make all the difference:
- Bracing your elbows against your body or the table to provide extra support
- Taking slow, deep breaths when working
- Resting the fingers of your non-dominant hand on the work surface to provide additional stability
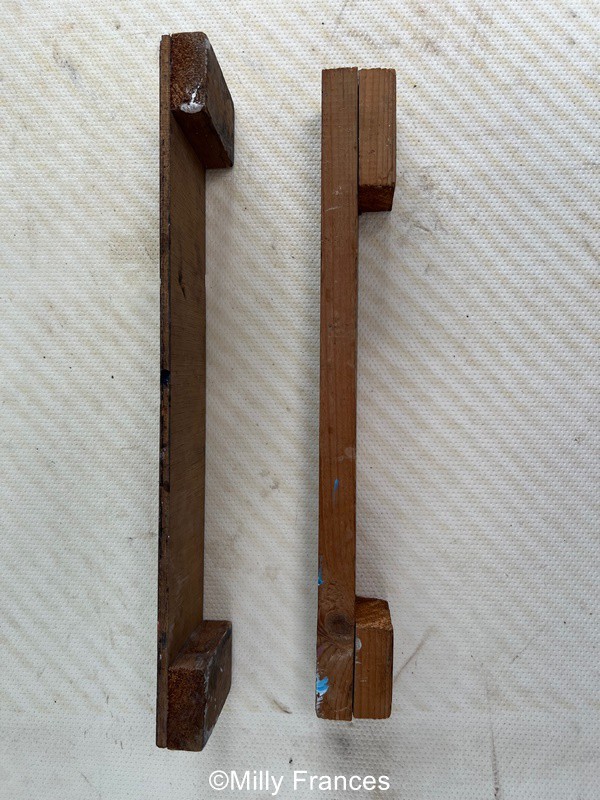
- Create a small wooden or metal rest to place your fingers on while soldering. This can provide additional stability to your hand.
- Using your other hand to stabilise
- Holding your soldering iron closer to the base of the handle (DO NOT TOUCH THE HOT BIT). This provides better control and reduces the effect of hand tremors on the tip of the iron.
- Taking short breaks to rest your hand and refocus
- Purchasing a supportive wrist brace (Amazon Link)
- Using a third hand or clamp to get the piece into a good position that reduces the problem (Amazon Link)
- Ensuring that your workspace is well-organised and clutter-free. A stable work surface is vital. I have some studio organising ideas here.
- Minimise caffeine and sugar intake and see if that makes a difference
- Take your time and work slowly. Rushing can lead to mistakes and increase shakiness.
I have some homemade wooden rests that work as a ‘shelf’ to brace my forearm on. I have a couple of different heights and find them very helpful. See images below.
One of my students has what she calls a ‘sort of’ working solution:
She puts down her first solder line as smoothly as possible. It results in an uneven solder bead. She lets the glass cool and goes back to it. By bracing her elbow on the table and holding her shaky arm with my other hand she goes back and smooths out the solder. It takes a bit of time but gets results.
Remember that it’s normal to have some level of hand shakiness, especially when starting out. With consistent practice and these techniques, you may see improvements in your ability to steady your hand while soldering stained glass.
Wheelchair Users
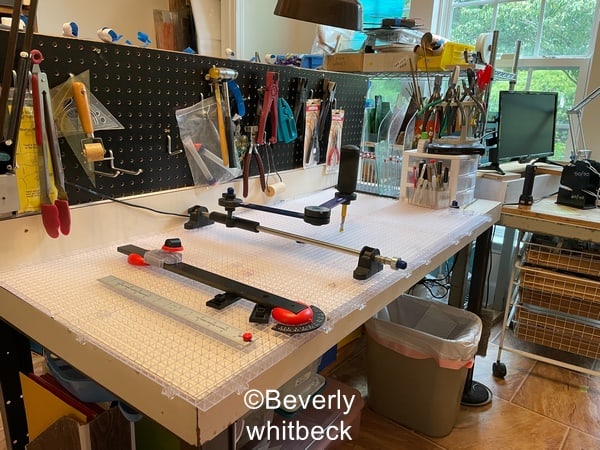
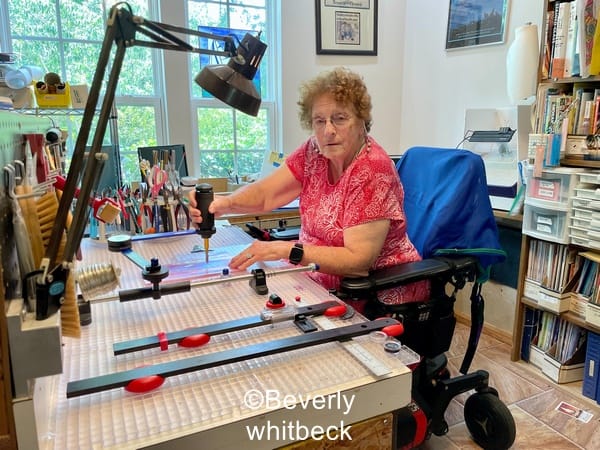
Online student Beverly Whitbeck is a wheelchair user and has kindly shared lots of great ideas – and photos – to show us her successful workstation set-up.
Beverly found that an L-shaped bench worked well for accessing all her different workstations. She can easily get under the workbench while in her wheelchair. Moving from her cutting table to her assembly and soldering station and glass grinding table is easy.
Beverly wanted to get rid of the additional lamps on her assembly table so she had daylight recessed lights installed above the table in front of the window.

She also has a pegboard at the back of the glass cutting side which holds all her tools. This means she can easily see and access them (Amazon link)
Beverly says 2 main things enabled her to get back to using her stained glass studio from her wheelchair.
- ONE. The Cutter’s Mate from Creator’s Stained Glass. She swapped out her Morton work surface for Creator’s set of grids so she could set it up to her needs. She also got their regular-size Beetle Bits Cutting system with the Flying Beetle glass cutter so she can have it set up alongside the Cutter’s Mate.
- TWO. The Adjustable Glass Grinder from Gryphon. You can see how this angles forward towards Beverly if you look behind her in the photo, below.
- She has since added Techniglass Grinder 2 which she loves. (Amazon Links)
Thanks SO much to Beverly for sharing her studio photos and taking the time to help others with similar mobility issues. You’re very much appreciated 🙂
Extra Tips
Kim Lary teaches stained glass at her retirement village. Here’s her list of the things she does to adapt:
1. We do have the Gryphon convertible grinder. I set it up on a dropped down counter where the cabinets have been removed so a wheelchair or scooter can roll in. I place the grinder in a 3ft x 3ft plastic drop tray with a pluggable drain. (doubles for washing larger pieces) Althou most of them will stand on an antifatigue mat for the grinding.
2. orthopedic seat cushions to raise the seat up – helps ease the shoulder strain. I have ordered a wobble cushion
3. THE ONE SCORE – why didn’t anyone mention this?) Makes a huge difference for those with hand strength issue or you don’t feel like standing up. We affectionately call it the sewing machine. Once they got hang of “you guide not push the glass thru. it have become the group favorite. We have 3 of them. I have demonstrated that you can get just a nice close cut with it as you can a hand cutter.
4. Ergonomic Grip pistol grip. I wrap with Nexcare Absolute Waterproof Tape, Flexible Foam. Also great for cover a bandage from getting wet.
5. Hakko soldering iron – less cords, lighter weight and easy to grip. We have a 90 degree angle soldering iron that I haven’t used in ages since we discovered the Hakkos. I guess I should play with it soon.
6. I keep a supply of readers Oversized lens if I can find them)
Kim’s personal fatigue buster is to always have a few projects in different stages, so she doesn’t overdue one position for too long.
Interested in posture? This is a recent study that suggests movement is more important than aiming for any particular ‘ideal posture’
Plus this one is an interesting overview – Is good posture overrated? Back to first principles on back pain
Cutters Mate Thoughts from Milly and other readers
Milly, thanks for the useful tips! I have a tremor which can make soldering in particular challenging & frustrating.. While I am on medication I find there are influencers, – time of day, caffeine intake & sometimes having a snack, taking a deep breath or just telling yourself you can do it help. We have relocated & I am eager to get my new workspace set up just right!
Thank you for your extra tips Linda, very helpful 🙂
I “teach” stained glass in my retirement village. There are several students who have mobility & strength issue. The Village powers that be have been most accommodating by converting one of the old kitchens into a play station for us. Here are some of the things we do adapt.
1. We do have the Gryphon convertible grinder. I set it up on a dropped down counter where the cabinets have been removed so a wheelchair or scooter can roll in. I place the grinder in a 3ft x 3ft plastic drop tray with a pluggable drain. (doubles for washing larger pieces) Althou most of them will stand on an antifatigue mat for the grinding.
2. orthopedic seat cushions to raise the seat up – helps ease the shoulder strain. I have ordered a wobble cushion
3. THE ONE SCORE – why didn’t anyone mention this?) Makes a huge difference for those with hand strength issue or you don’t feel like standing up. We affectionately call it the sewing machine. Once they got hang of “you guide not push the glass thru. it have become the group favorite. We have 3 of them. I have demonstrated that you can get just a nice close cut with it as you can a hand cutter.
4. Ergonomic Grip pistol grip. I wrap with Nexcare Absolute Waterproof Tape, Flexible Foam. Also great for cover a bandage from getting wet.
5. Hakko soldering iron – less cords, lighter weight and easy to grip. We have a 90 degree angle soldering iron that I haven’t used in ages since we discovered the Hakkos. I guess I should play with it soon.
6. I keep a supply of readers Oversized lens if I can find them)
I like the idea of arm supports. Going to look into that.
My personal fatigue buster is to always have a few projects in different stages, so I don’t overdue one position for too long.
Personal note – Millie – My hubby & I are huge fans of yours. You are the real deal in our opinion. You talk sense honestly without the self-important flatulence (yes that’s the word I want) of most “internet wanna bes”
What a truly helpful set of pointers Kim. Thank you SO much on behalf of both me and all my readers who will benefit from this. I think I’m going to cut and paste it into the article so that it doesn’t get missed as the Comments Section grows. You have some fabulous ideas and solutions here, wow.
Thanks too for your kind words. I really feel like we all help each other and am always amazed and delighted at peoples’ generosity in sharing their knowledge and time. So I’m a huge fan of yours, too 🙂
I read your tips and hints on Aches and Pains Making Stained Glass.
I found them very useful, even though I don’t make much these days. The thing is that these tips apply wherever you’re working at a workbench or desk, cutting glass or bashing out text on a laptop.
Thanks very much
Pete
Good point Pete, they are universal tips really. Just don’t try writing with a glass cutter LOL.
Thank you Milly. You make all good points. Glad you are addressing this because it is a big problem for some people. The video showed things that was unintentional, but a learning experience for those with Carpal Tunnel. First –be smart about your work. For example in opening the box use a razor knife and do not go through all the work and wrist strain in doing this. Notice the brush on the work bench. It is the wrong type. Need one with a handle to minimize the wrist action. And separating the glass after scoring is less strain using a tool (and safer), rather just your two hands. Using the shears to cut paper is more difficult on wrists and this is an indication to me that the work-station is not laid out properly that one can instantly get you hands on all tools that are needed. PS–double scoring over the identical cut is a no-no.
Thank you for taking the time to add extra suggestions Jay. They’re very helpful.
Depending on the type of aches and pains we have, different brushes suit different people. So I wouldn’t say they’re ‘wrong’, just not right for you. We all need to find what works for us.
Thanks again for your useful comments.
Just what I needed! Have not done glass for 2 years due to carpal tunnel and last week had my right hand carpal release. More inspired thanks to this great information.
Thank you so much for sharing this Milly!!!
So happy to hear you’re back to glass again Melissa. And that my post with all the help from contributors has been helpful. Welcome back 🙂
Hi Milly I, too, am getting older and need to apply many of the tips and tricks you have mentioned. Although I am a fuser, not a stained glass artist, so many of the situations you mention here are valid for me as well. Thanks for taking the time to write this very comprehensive and excellent article!!
Glad you found it of help Victoria. As you say, holding any posture for a long time is likely to bring on aches… fusing or stained glass both 🙂
As i age- i am finding a sore back is the worst- the eyesight is also not as sharp- i do take regular breaks- thx for the tips
You’re welcome Judy.
EXCELLENT. I already do most of these, but will incorporate the wrist block and step for long stands. And a big thanks to Beverly for sharing her tips.
Hear hear, Beverly’s a star 🙂