3 Ways to Solder Over Gaps in Stained Glass
I get asked quite a lot about how to solder over gaps in stained glass. Here are 3 ways of filling in different shaped gaps.
Filling In Large Irregular Gaps
The best way to fill this type of gap is to scrunch up little tiny bits of copper foil. My favourite solder for this job is Canfield 60/40 (paid link). This saves you solder because where there’s foil you won’t need stained glass solder.
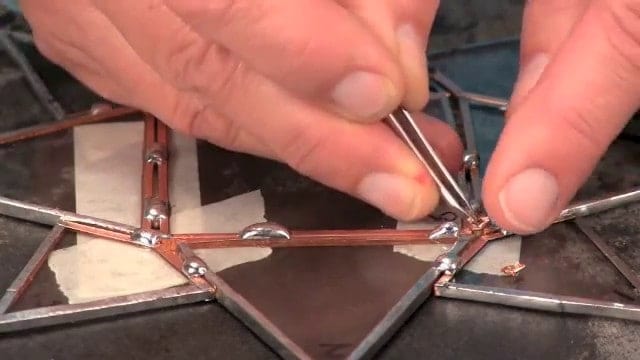
You just slot them in the gap, making sure that they’re flush with the top of the glass so that they don’t stick out above the solder. Then solder over the top.

This is Side 2 of the seam filled with scrunched-up copper foil. Just flux and solder over the gap as normal.
Filling Gaps Video
If you struggle to achieve smooth solder seams there are a couple of simple techniques you can learn to improve it.
If you don’t have a local class my Stained Glass Made Perfect course has helped many people improve their solder lines. And we know how crucial they are to a piece! The course is self-paced and online so you can learn these soldering techniques even if you are unable to get to a class. You can find out more about it here: Stained Glass Made Perfect.
Soldering Over Long Thin Gaps
For this long thin gap the approach is a little bit different. Stick 2 pieces of copper foil together and then fold them over so that they’re no longer sticky before inserting them into the long thin gap. Again, make sure that it’s flush and doesn’t stick out over the top of the glass.
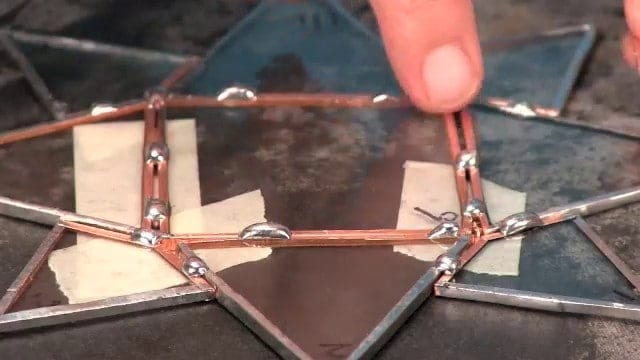
I’m pointing at the long thin gap. Notice I’ve got masking tape underneath? This is to stop solder from seeping out the other side.
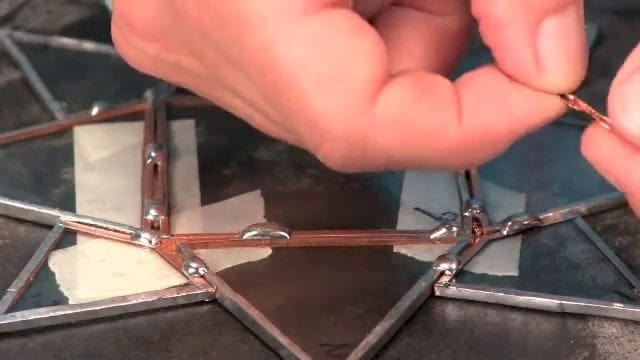
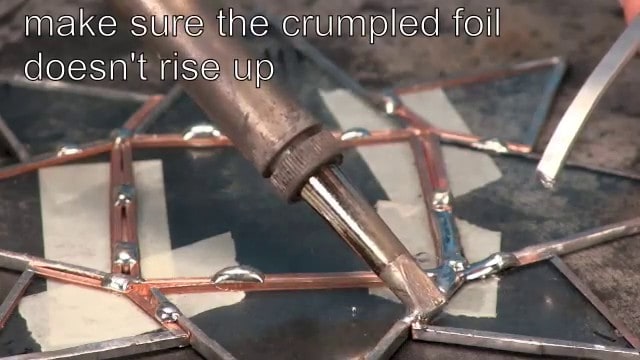
Flux everything and then start soldering. Be prepared to use quite a lot of solder in the gaps despite the copper foil filling. You have to solder quite quickly, especially when you do Side 2. This is to prevent it from seeping away through to the other side.
You can make quite a nice seam covering a gap, although it’s always better not to have gaps in the first place of course!
Soldering Over A Gap Without Filling First
This is the third example I’m going to show you. I’m just going to fill the gap with solder and not bother with copper foil.
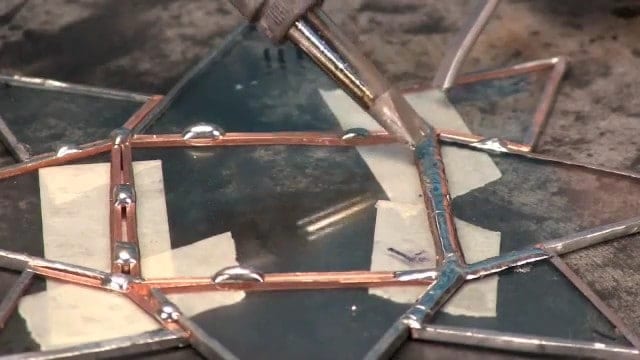
Look at the seam to the left of the image. Can you see I’ve got masking tape underneath the seam to stop it coming out the bottom underneath?

Start with a layer of solder and then let it cool.
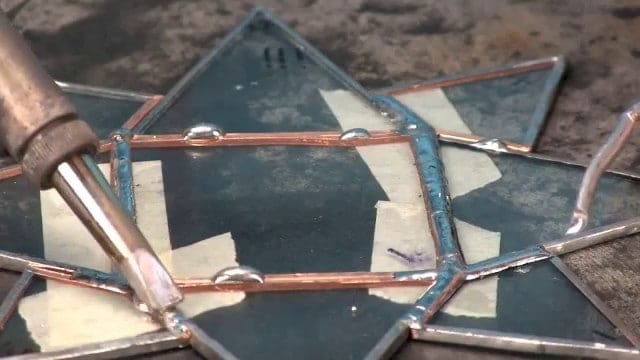
Once it’s cooled down enough you can add another layer of solder on top.
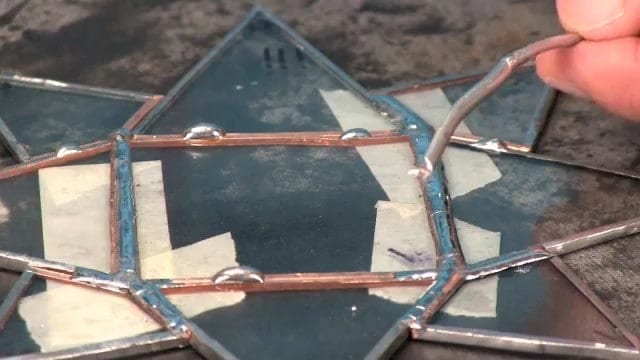
Now you have a nice smooth solder seam. You have to solder fairly quickly otherwise it will want to leak through to the other side.
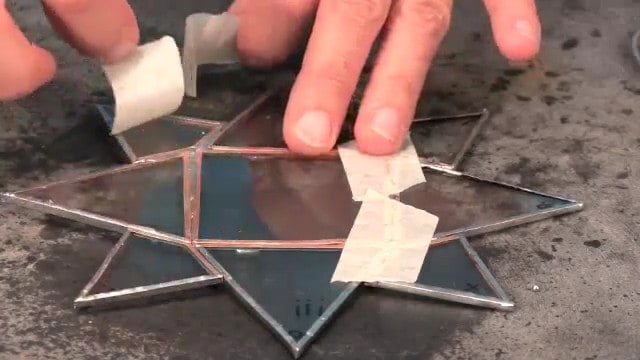
When you turn it over you can see how little soldering work there is left to do. This is pretty straightforward.
Stained Glass Soldering Problems
PIN IT FOR LATER


I’m ready to solder a new piece, and the timing of this video is perfect since I do have one larger gap. Thank you for sharing these tips. I always look forward to receiving your email. Do you have any tips on avoiding these kinds of gaps? Thanks 😊
This made me smile Nicole 🙂 Cutting more accurately is the only way to avoid gaps in a meaningful way. I have lots of cutting tutorials to help you here: https://everythingstainedglass.com/how-to-cut-stained-glass
Good luck and thanks for your comment.
I love the comments. I have used copper wire to fill in space. Have made some boxes and it helps to fill in the sides. Also I used some beaded chain before. I want to try some twisted wire as well. I love all the comments. Thank you.
Milly, once again you come along with answers to many problems for me. I love ALL the ideas for filling the gaps, as I seem to get many of them, but my cutting is getting better and better with practice and your tips. Thank you and keep them coming. I also would live you to be closer to me so we can talk in person, but alas, it is what it is. Merry Christmas and Happy New Year. 🙂
How lovely to read this Nancy, thank you. You’re right; the more accurate the cutting the less ‘fixes’ are needed but sometimes needs must!
I often use 50/50 as a first layer to seal the foil stuffed gap. Then I switch to 60/40 with its lower melting temperature to work the bead.
Great additional bit of information for the page Ed, thanks. 50/50 is cheaper, too, so an even better idea!
I have been filling the inadvertent gaps in my glass work is that I take a copper wire out from the electrical wire and hammering it flat to fit in the gap. The advantage of this has been providing some strength to the otherwise weakened seam.
Brilliant idea Anil, thanks for posting. I’m trying to imagine you hammering it and am assuming that you do that BEFORE fitting it into the gap 🙂
For filling in gaps (which sadly happen too often for me), I’ve taken to using scrap came. An especially good size is a 5/64″ round U. Trim one edge of the U off and cut to length. It will slide in fairly well and then the repaired length comes pretty close to the width and helps disguise the gap. On the opposite side the solder fills in without leaking through to the good side.
That’s another great ‘filling gap’ suggestion Michael, thanks for taking the time to share it. This will work well for lead came panels too, if you happen to cut the leads too short near a join.
Milly, you are the best. You not only share your expertise but you are super kind to us newbies. I have learned lots from you. I only wish you lived near by so l could make us a cup of tea and have a chat. Hugs.
I’m always up for a cuppa Mugs 😉 Thanks for your kind words, I’m glad my stained glass tutorials help.
Hie Ms Milly,
Thanks a lot for all your valueable tips.They help me a lot in improving my works.Please keep sending them.I always look forward to your mails.Many thanks.
Hi Mr Robert 😉 thanks for your kind comments… you’re on my newsletter list and will continue to receive helpful tips and ‘stuff’ until you unsubscribe.
My free Cutting Curves eBook and newsletter is here, if anyone else wants to join us 🙂
Hi Millie:
Thank you for sharing, your lessons are quite useful. I encounter odd shaped gaps when constructing sea glass lamps. Using genuine sea glass that I do not alter, occasionally leaves larger gaps than you describe and not desirable. I have found the easiest way to fill these is to use brass sheeting, available at most hardware stores. It comes in sheets that are 4 by 10 inches of various thicknesses. I prefer sheets which are 0.005 inches, which are easy to cut to size with conventional scissors. Simply cut to the size of the gap and solder in place.
This is a brilliant additional tip John, thanks so much for adding it to help others 🙂
Your sharing is a great blessing. Thank you so very much. There is nothing like learning from the best.
God is so good.
That’s very kind of you Monika, glad you find my videos and tutorials helpful.
You can also buy a roll of stiff, thin copper stripping which is also used to reinforce vulnerable seams. It is the exact width you need and can be cut to any length or even doubled up.
Thanks Kathy, did you mean ReStrip or the braided wire? Either would work fine if you have it, thanks for adding it!
Yes to Kathy, I also use restrip if I have a gap.Works well and I have it around as Iike reinforcing projects well for the long-term.I think it may be less fussy than the scrunched up foil. But I try and work hard not to have gaps,but at times it seems unavoidable,and solder has become so pricey!! I have been enjoying your ideas Milly from across the pond! Have spent a good deal of time in the U.K. Cheers!!
Thanks for your thoughts Cheryl, it’s always good to hear others’ experiences. Solder is very expensive now – along with everything else at the moment it seems 🙁
My husband suggested small pieces of copper. wire – haven’t soldered yet, I’ll let you know !) 😬
Just make sure that the wire doesn’t pop up over the top edge and you should be alright with that. The copper foil takes up more space so may be a bit easier but let me know – good idea!
Filling gaps video , really helpful . Using small pieces of foil , So simple why hadn’t I thought of that !
Thank you Milly .
The simple things are the best, don’t you find Barbara! Glad you found it helpful.
Thank you again for some really good information
You’re most welcome Joan 🙂
millie thank you for yout valueable video. You have solved a 10 question fior me on how to fill gaps. thanks a bunch
Great to hear that the video helped your stained glass Nancy, thanks. Try to keep the gaps even and to a minimum though, otherwise you’ll get uneven solder lines.