Essential Equipment for Leaded Stained Glass
This isn’t a leaded stained glass tools wish list, that would be far longer! This page introduces you to the essential stained glass tools for the lead came technique and helps you decide which ones you really need.
Stained Glass Kits
If you don’t want to choose and buy each item individually you can always buy a starter kit. Ready-made stained glass kits make the whole process easy and are a great choice if you already have the tools for copper foiling and want to upgrade and give leading a try.
There are different starter kits for Copper Foil and Leaded Stained Glass methods so make sure you choose the correct one. This Lead Kit (paid link) from Delphi has everything you need.
If you’re new to using lead came as a technique I would highly recommend you give it a try. It will add a great deal to your skill set and give you the best of both stained glass worlds – foil and lead.
If you don’t have a local class my Leaded Stained Glass Artistry course has taught many people – even those who have never used lead before – how to make a stained glass panel using lead came. The course is self-paced and online so you can learn this lovely technique even if you are unable to get to a class. You can find out more about it here Leaded Stained Glass Artistry.
Glass Cutting Tools
- Glass Cutter
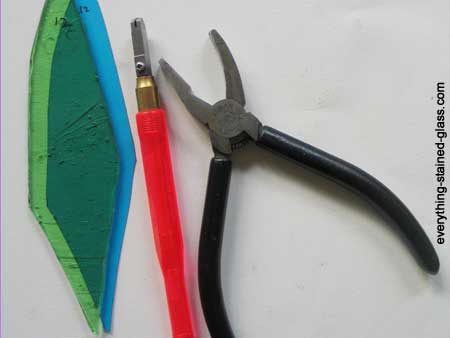
I’d recommend an oil-filled cutter for all kits, simply because I don’t like the cutting stained glass without oil. They’ve all got the same tungsten carbide wheels, but I’d recommend Toyo cutters (Paid link). I’ve used mine for years. (If you’re a fuser, it’s best not to use oil as it leaves greasy marks which can fire in permanently.)There are different shape cutters to suit different people. If you have trouble applying pressure with a pen-shaped cutter, you could try a pistol grip cutter. (paid links, thanks 🙂 )
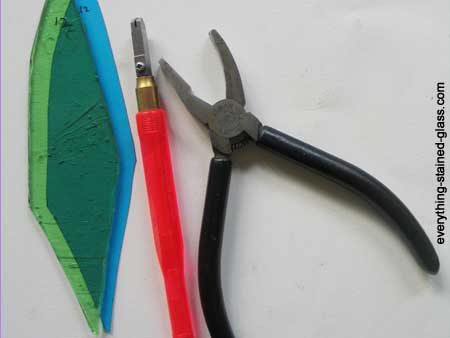
- Grozing Pliers or Breaker/Grozers
These pliers are specifically made for making stained glass. They remove any splinters of glass after the score line has been broken, or eat into sharply angled curves. - Safety Goggles
A common but essential item in all stained glass kits. - Grinder
You can get away without a stained glass grinder if you are using the leaded stained glass construction method, as the lead came covers the edge of the glass and gives you a bit more leeway for error. Grinders DO make life easier though, and I would recommend one if your budget stretches to it. If you’re not sure which grinder go for, there are some grinder recommendations here.
Leading Up Tools
- Lead Knife
Your leaded stained glass tools kit has to include a lead knife so that you can cut and shape the lead came to size.
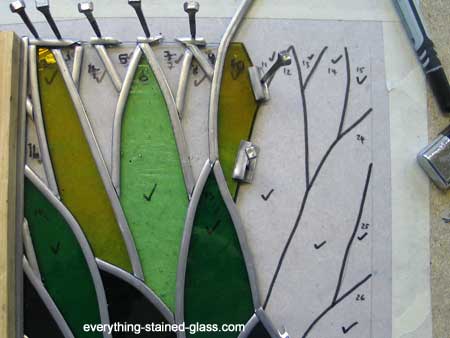
Shape your stained glass lead came with a lead knife These knives nicely weighted to bang in the horseshoe nails and they cut the came accurately. Keep them sharp for best results. You can also buy lead nippers, which are more like pliers. They’re easier to use and great for all but the very long, thin angles.
- Fid
This is an extremely useful, cheap plastic tool and essential for making leaded stained glass. It opens up the lead came before leading and presses them down after cementing. You can read more about it here. - Lead Stretcher or Vice
Holds the end of your 6ft lead came firmly so that you can stretch it before leading.There’s lots of expensive alternatives, but the most basic lead stretcher does the job of holding your lead while you stretch it. Just place the end of the lead came in the serrated jaws and pull with pliers.
- Lead Came
Comes in 6ft lengths or in spools. There are lots of different widths so choose carefully to suit your design.Be creative with your choice of lead came. Have a look at all the different widths and profiles available and choose the best one for making your panel stand out. This page goes into the different profiles and gives you lots of ingenious storage solutions.
Tools for Soldering Leaded Stained Glass
- Soldering Irons
You need at least a 100-watt soldering iron. They’re light, safe, flexible and – best of all – thermostatically controlled if you buy one 100 watt or above.This is an expensive and essential part of all stained glass kits, and worth spending some time thinking about. I have written a review page on the best soldering irons here if you are thinking of buying one.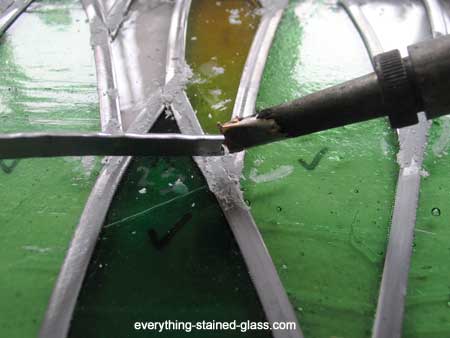
Heating solder over the lead joint - Flux
Use a flux – either a paste flux or tallow – to ensure the solder runs smoothly and sticks to the lead. This is essential, the solder will just roll off the lead if you don’t use it. - Solder
Solder that’s 60% lead and 40% tin is standard for copper foil work and 50/50 is best for lead came work. Of course, you can solder lead with 60/40 too. It’s all to do with melting temperatures. The 60/40 runs smoothly and lends itself to foiling.
Cementing And Polishing Tools
- Black Cement or Leaded Light Cement
This is the putty that you put under the lead came to make your panel strong and waterproof. You can save yourself a great deal of mess by buying ready-made black cement, or find out how to mix your own cheaply from my how to stain glass cementing tutorial here. - Whiting Powder
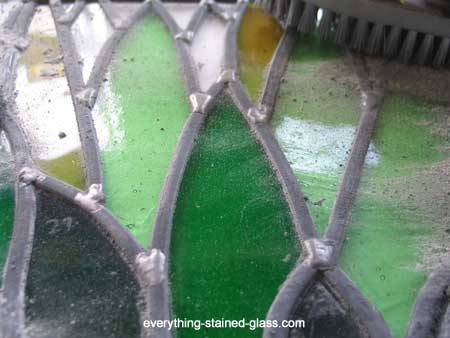
Using whiting to brush off black cement Some people use sawdust – or talcum powder in times of dire need – but whiting powder (chalk dust) is the best. It doesn’t smell and cleans the black cement off brilliantly.
Use a mask when you’re using this.
Simply sprinkle the whiting powder on after you’ve pressed the putty under the lead. Use a brush and a bit of elbow grease to remove all the mess. It’s surprising how quickly it soaks it all up. - Grate Polish. L
Use a standard shoe brush to apply polish and blacken your lead came. This finishes your work off beautifully.
Suppliers Of Kits and Stained Glass Tools
Any outlet that sells stained glass art supplies will stock these essential tools. If there isn’t a store near you don’t worry, as there are many online stained glass suppliers that will ship all over the world.
I’ve always found Amazon to stock everything and be very reliable and prompt. They stock just about everything you could possibly think of. The only down side is trying not to resist all the unnecessary delights available! If you stick to the list above you should be ok.
Helpful Resources
So now you know what tools are needed to make up a decent stained glass kit you might want to have a look at my free how to make stained glass tutorials. They start right from the beginning and take you through each step, with useful photos and videos.
Stained glass doesn’t have to mean mega-bucks. There are lots of tips that can help reduce the amount you spend on tools and materials. Here’s one of my stained glass videos with some cash-saving ideas:

What is the “grate polish” I’m having a hard time finding it online
It’s stove polish. It comes in a tube and was used for blackening stoves. I have a link to it on this page: https://everythingstainedglass.com/recommended-tools
It’s only for leaded panels, not copper foiled ones.
I hope that explains it Sarah.
Why is the name of the tool that you use to cut the loops? Do you have the link?
I’m a bit unsure which tool you’re talking about Lisa, so I’ll guess – if it’s for cutting wire loops it’s a standard wire cutter, you can pick them in any hardware store. I don’t have a specific link, sorry.
Hi, love your website. The starter kit on this page with the Weller solder iron takes us to a kit on Amazon at £12.99, but this is not the correct kit. Any chance you could update us with the correct link. Thanks.
I’m afraid these kits aren’t available in the UK. The link takes you to what it thinks is the nearest item which – as you say – is all wrong! If you’re wanting a starter kit Tempsford Stained Glass sell some good ones. Make sure it’s one that includes a Weller 100 iron.
Thanks for your question and apologies for the frustration.